Use multiple AI models in one session, then keep going with documents, knowledge bases, academic literature, and visual content.
Chapter 1
About DiffMind
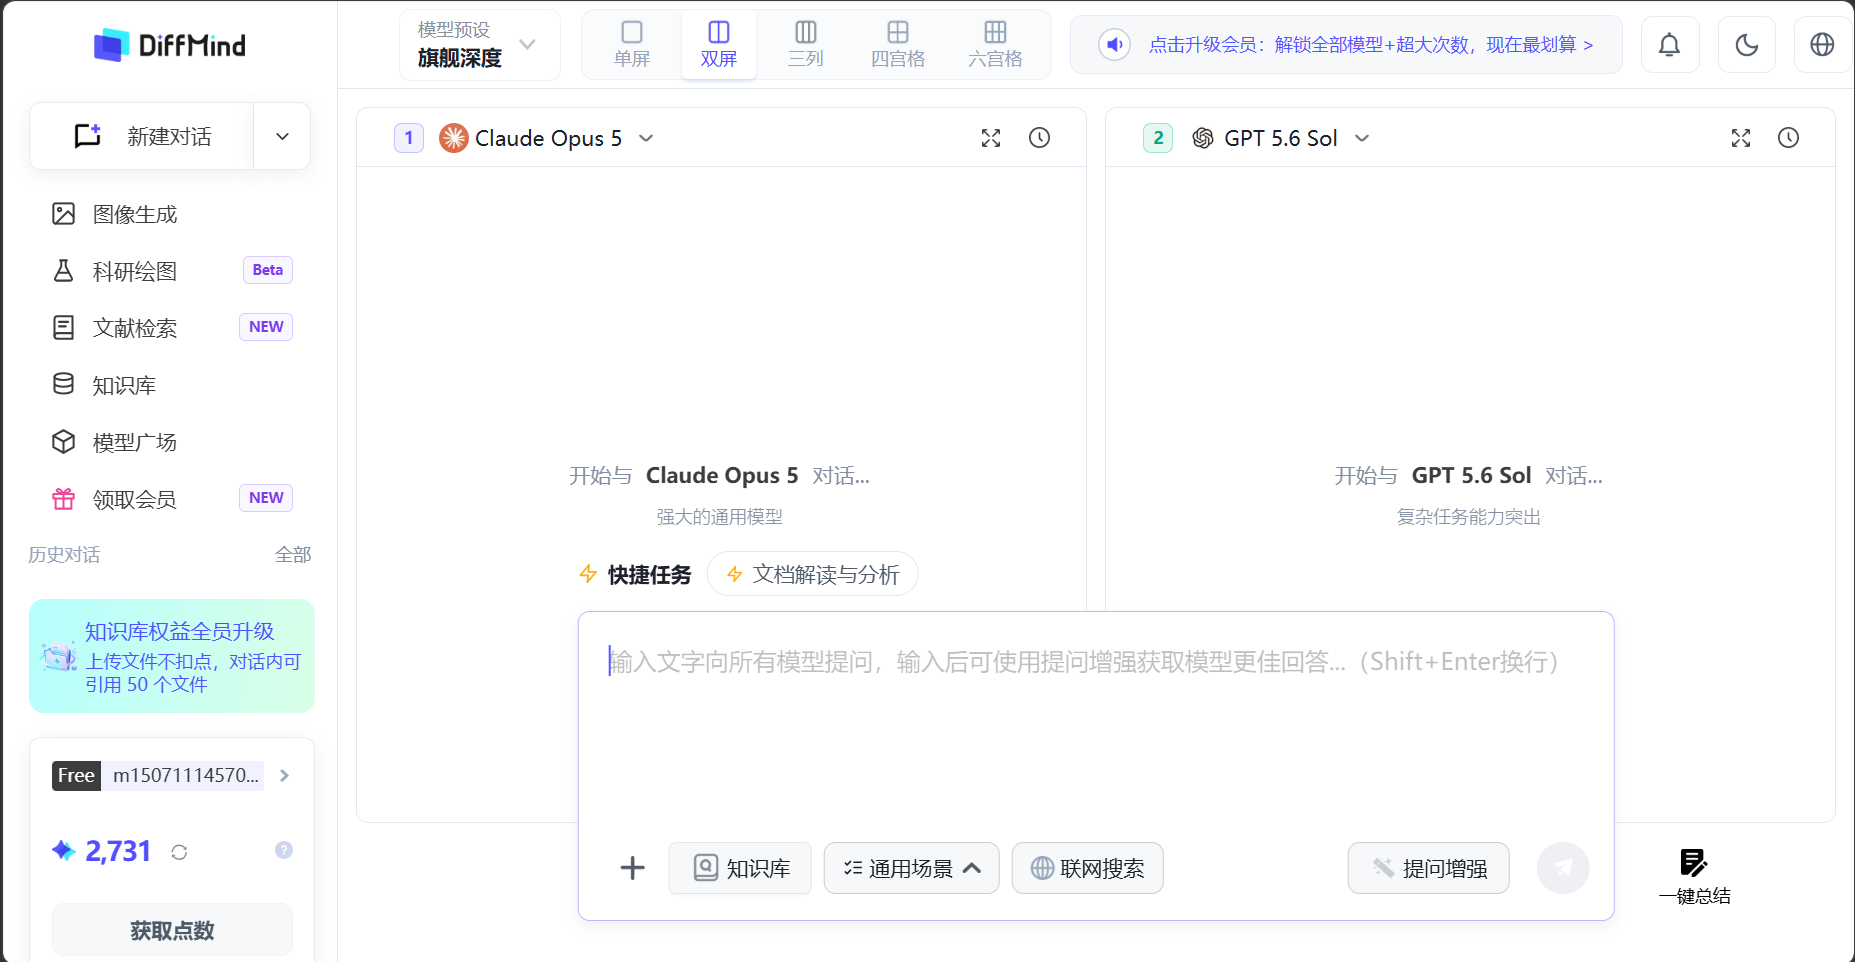
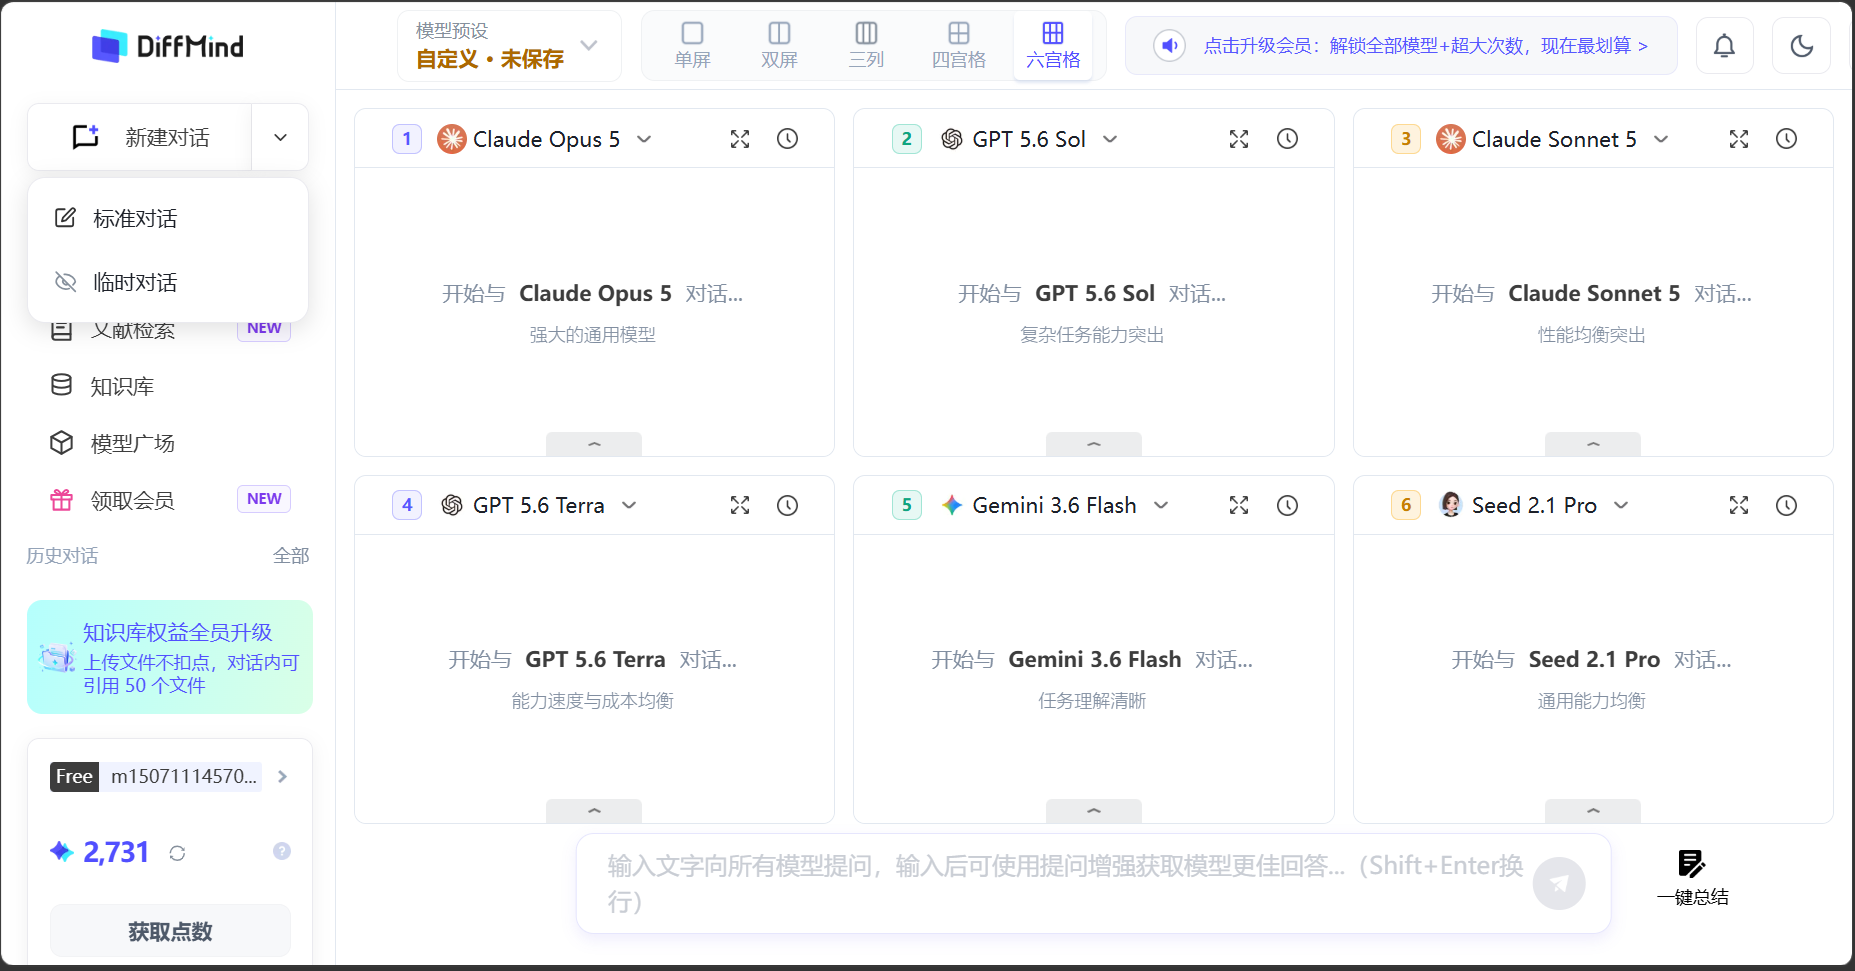
DiffMind is a multi-model AI comparison workbench for academic research and everyday knowledge work. Instead of opening several AI sites separately, it puts model selection, multi-window chat, task input, and result organization on one page.
You can start from task presets or freely combine models. Send the same question to many models at once, or assign different tasks to different windows. When replies are ready, One-Click Summary helps you organize the round.
Main workbench: left navigation, multi-window chat, shared composer, and One-Click Summary
One session, several ways to work with AI
For the same task, different models can answer at the same time—you do not need to copy prompts repeatedly. When one direction is worth pursuing, continue in that window, or switch models mid-thread so a new model picks up the same conversation.
If you are unsure how to mix models, use presets for rigorous checking, creative writing, or general tasks. For a freer mix, choose a 1-, 2-, 3-, 4-, or 6-pane layout and assign a model to each window.
Continue from chat into your materials
DiffMind is more than text chat. Local files and images can join the current task. Materials you need again can live in the knowledge base and be cited later. Literature search finds papers by topic, or locates them by title, author, or DOI.
For visuals, use multi-model image generation or scientific figures. Image generation calls several image models at once from a prompt and optional references. Scientific figures combine papers, reference images, and knowledge-base files, then apply figure type and color settings for academic diagrams.
When DiffMind fits best
Use it for paper reading, literature search, and scientific figures—or for proposals, report analysis, content creation, long-form editing, and everyday Q&A. Multi-model shines when you want several results at once, clear model division of labor, or one place to keep refining materials and conclusions.
The workbench is DiffMind’s primary workspace. On a first visit, you do not need to try every control. Start in this order: decide whether the task should stay in lasting memory, pick a model mix, then choose whether models should answer the same question or take different roles.
Choose a standard or temporary chat
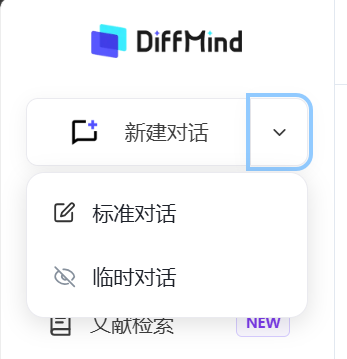
Open the dropdown next to New chat on the left to choose a standard or temporary chat.
Standard chats fit multi-turn work you may reopen later—paper reading, proposals, project analysis, and long-running research. If you are new or unsure, start with a standard chat.
Temporary chats fit one-off rewrites, quick questions, or idea tests. Both appear in history: use standard when you will continue; use temporary when you only need one pass.
Pick a task preset
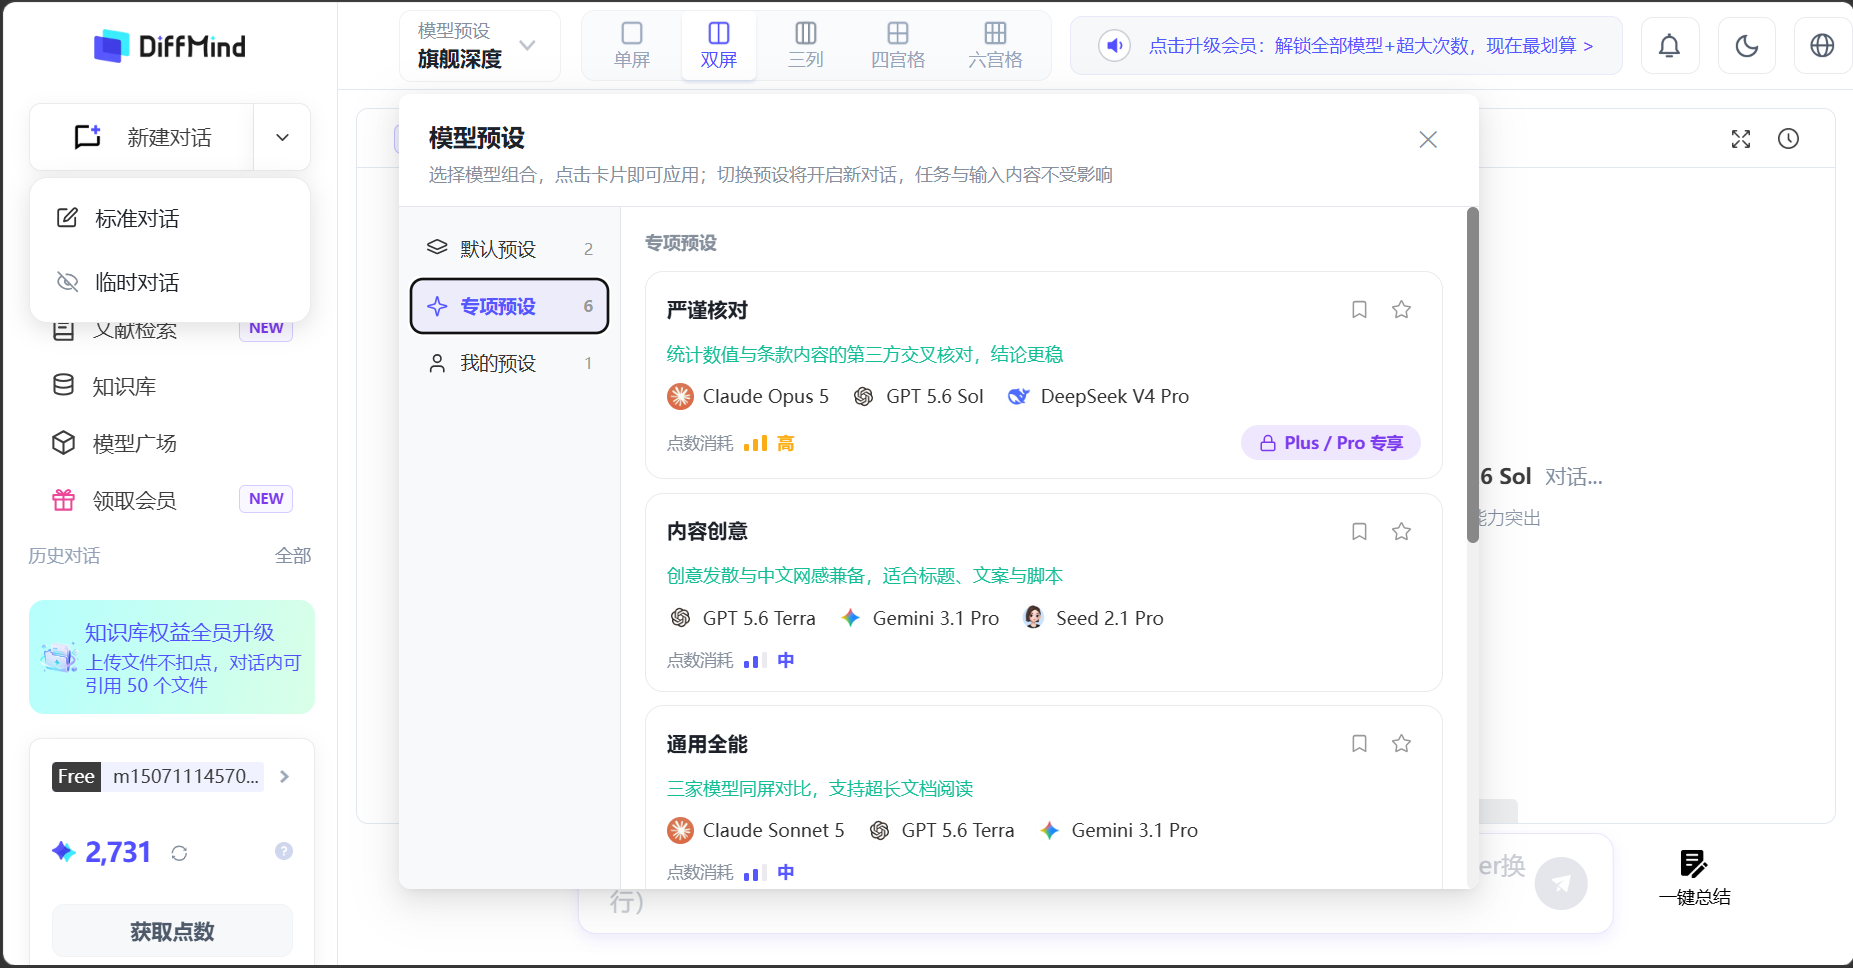
If you are unsure which models to use, open the presets at the top first. A preset is a task-based mix, not just a model list. Pages include default, specialist, and my presets. Each card explains the task and shows the models inside.
Rigorous checking
Best when you need several models to cross-check the same material.
Creative writing
Titles, copy, and scripts.
General purpose
Long-form reading and mixed tasks.
My presets
Save a frequent mix so you do not pick models one by one.
Click a preset card to apply its pane count and model mix. Switching presets does not clear the current task or draft. You can also create a preset, name it, and save a mix you use often.
Task presets: ready-made multi-model mixes
Choose a window layout
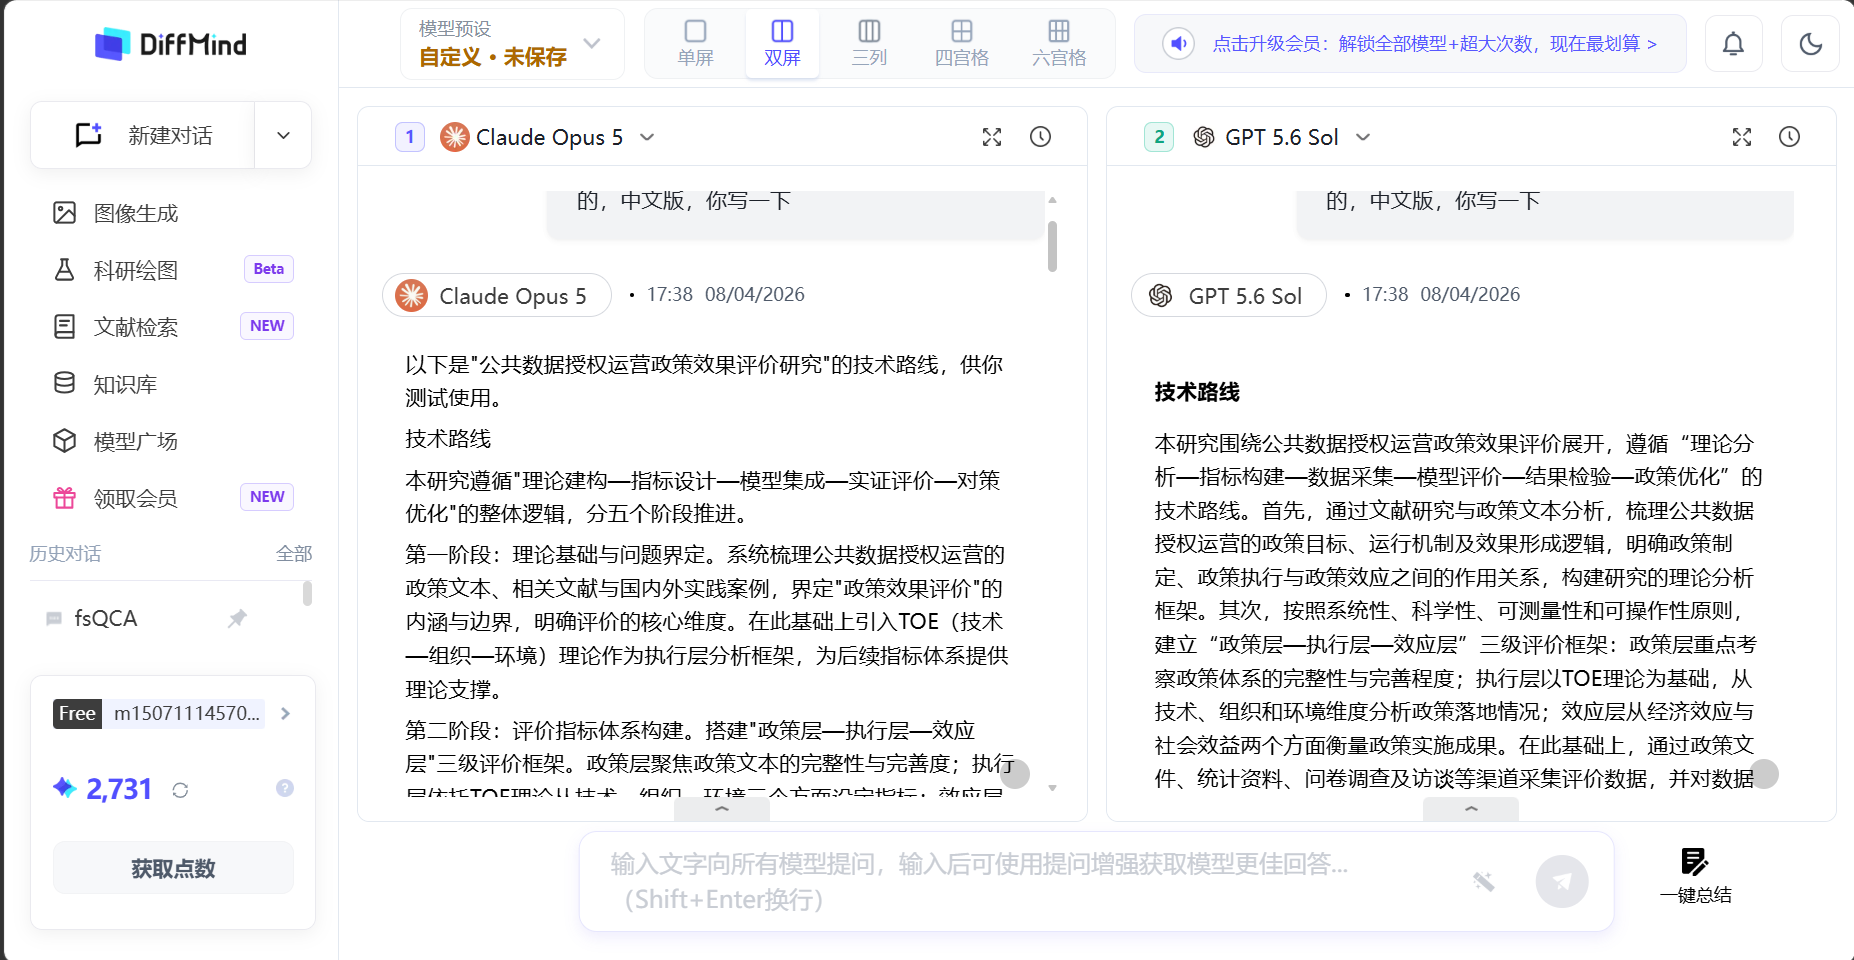
Without a preset, pick a layout first, then assign a model to each window. Layout only sets how many panes you see and how they sit—not which model each pane uses.
Layout
Best for
One pane
One model, focused reading and follow-up.
Two panes
Two models side by side, with enough room for a first visit.
Three columns
A balance of comparison range and reading space for most tasks.
Four panes
Four models when you need more directions or a clear split of labor.
Six panes
Collecting many results at once; use fullscreen when replies run long.
Change a model in one window
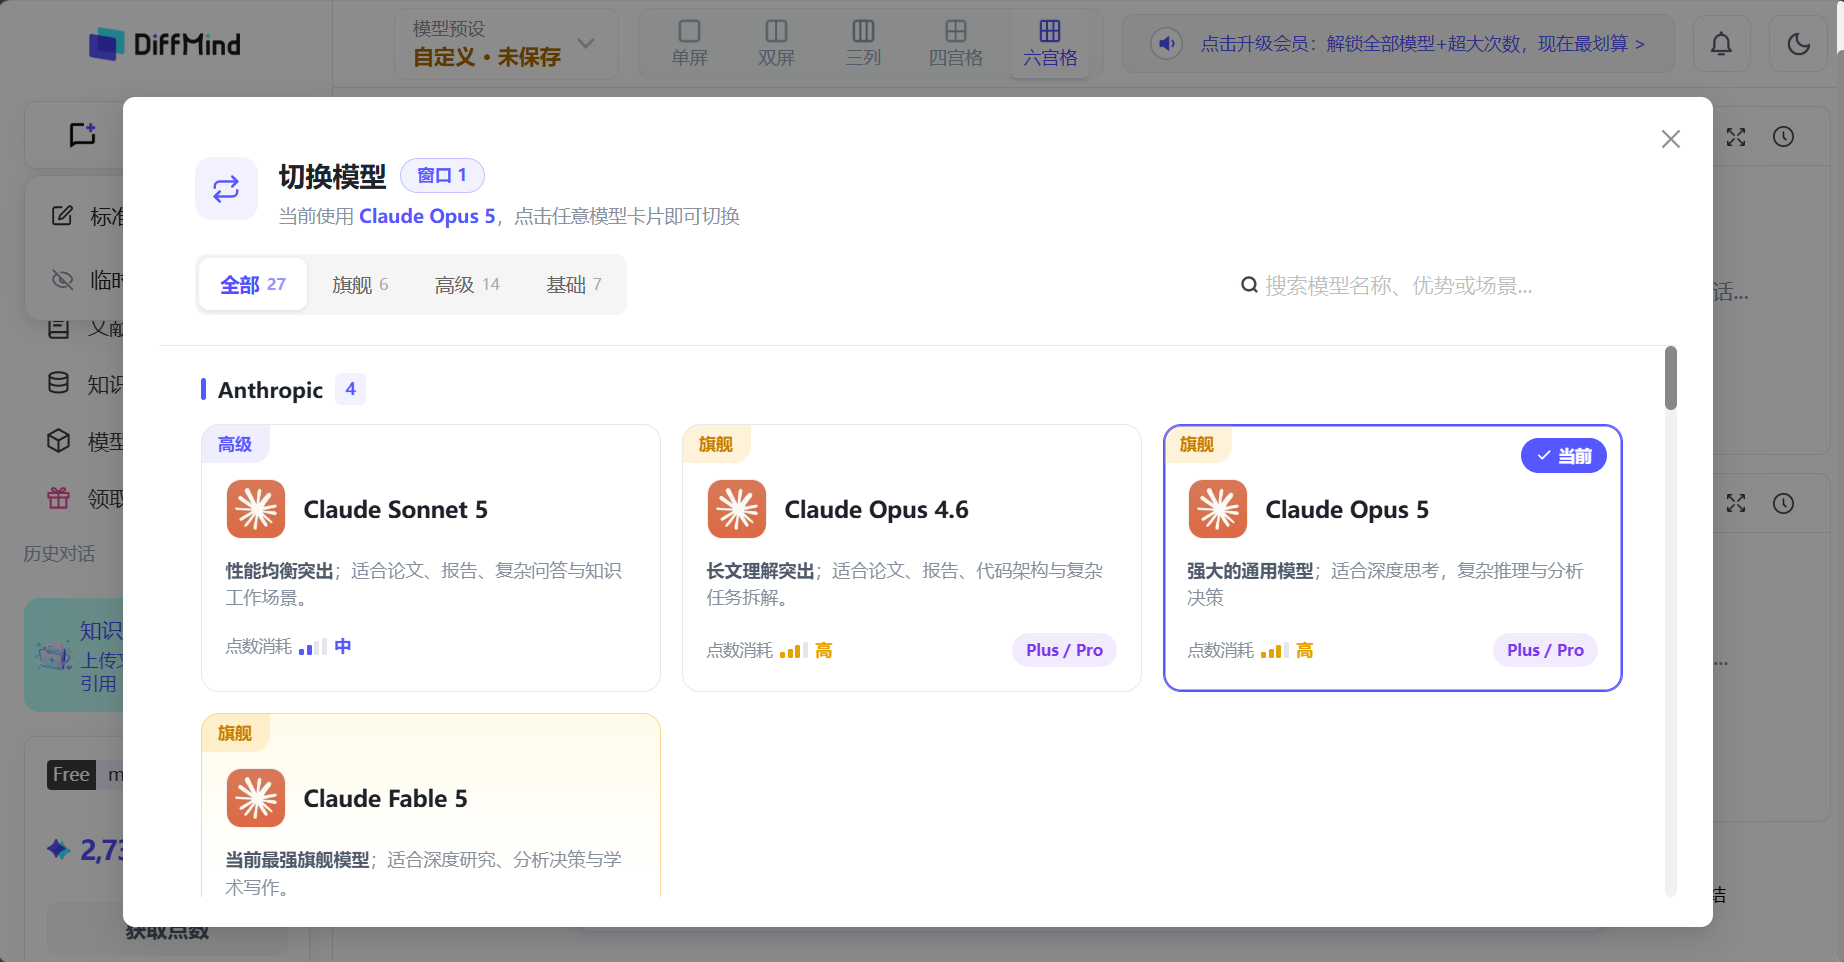
Click the model name at the top of any window to change only that pane. Browse by all, flagship, advanced, or basic tiers, filter by vendor, or search by name, strength, and use case.
Read the capability note on each card, then match it to the task—long context for long papers, faster models for quick Q&A, stronger reasoning for analysis. Only the current window changes. If the chat has already started, the new model can continue from that window’s earlier messages.
Ask every model the same question
The bottom composer sends one message to every active model. Each window then writes its own reply. When one model finishes first, you can read it without waiting for the others.
Give models different tasks
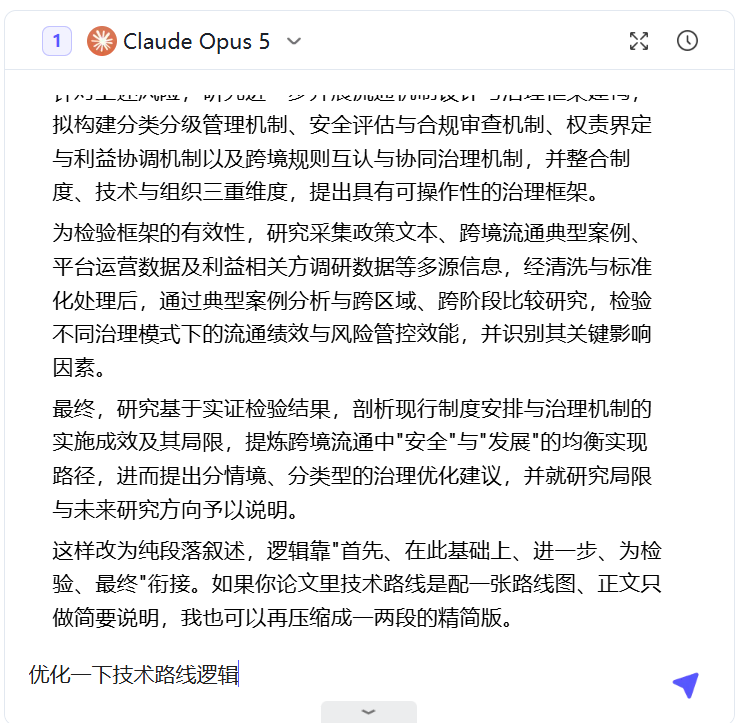
For division of labor, do not keep broadcasting from the bottom composer. Open a window’s own composer so the message reaches only that model. For example: let three models read the same topic, then ask one to outline, one to add examples, and one to rewrite.
You can mix both in one session: align context together, dig in separately, then return to the bottom composer to add a shared follow-up.
Task scenes and Prompt Boost
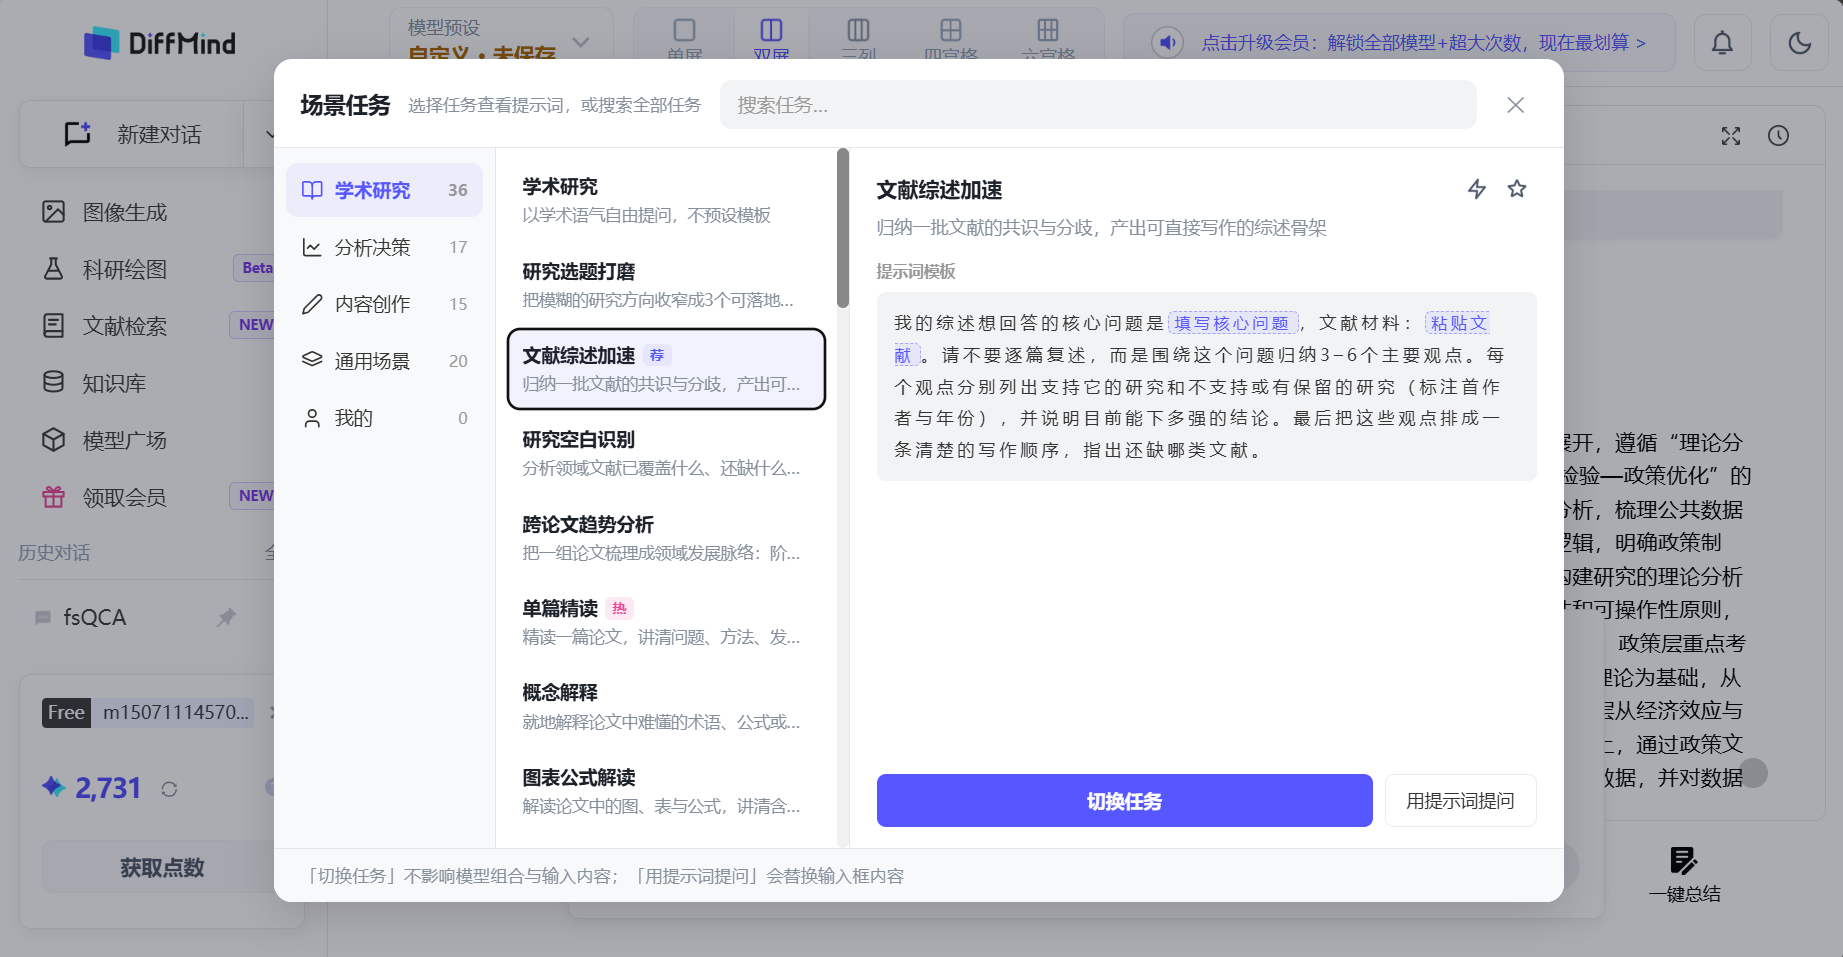
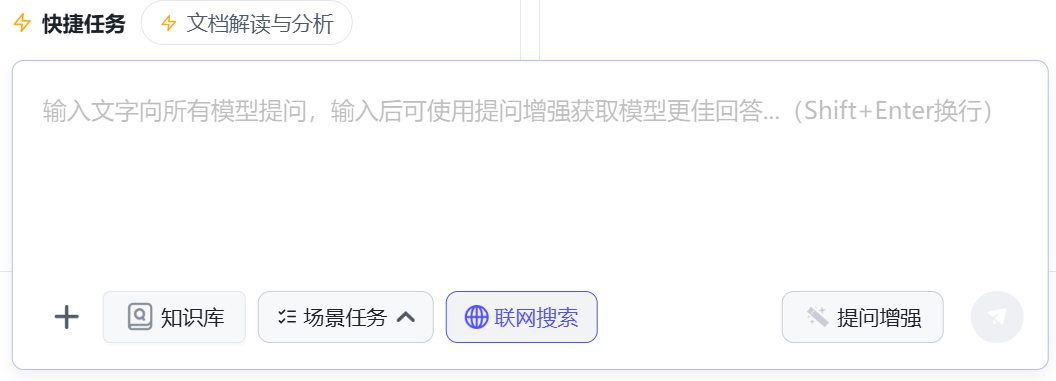
If you do not want to start from a blank box, pick a task scene first. When you have a draft but it still feels incomplete, use Prompt Boost. The expanded text returns to the composer so you can edit before sending.
Scenes help you choose what to do. Prompt Boost helps you say what you already want to do more completely.
Turn on web search when you need the live web
Enable web search before sending when the round needs current pages, public sources, or recent updates. Leave it off for files, knowledge-base materials, or tasks that do not need the web. Availability can differ by model—follow the switch on the page.
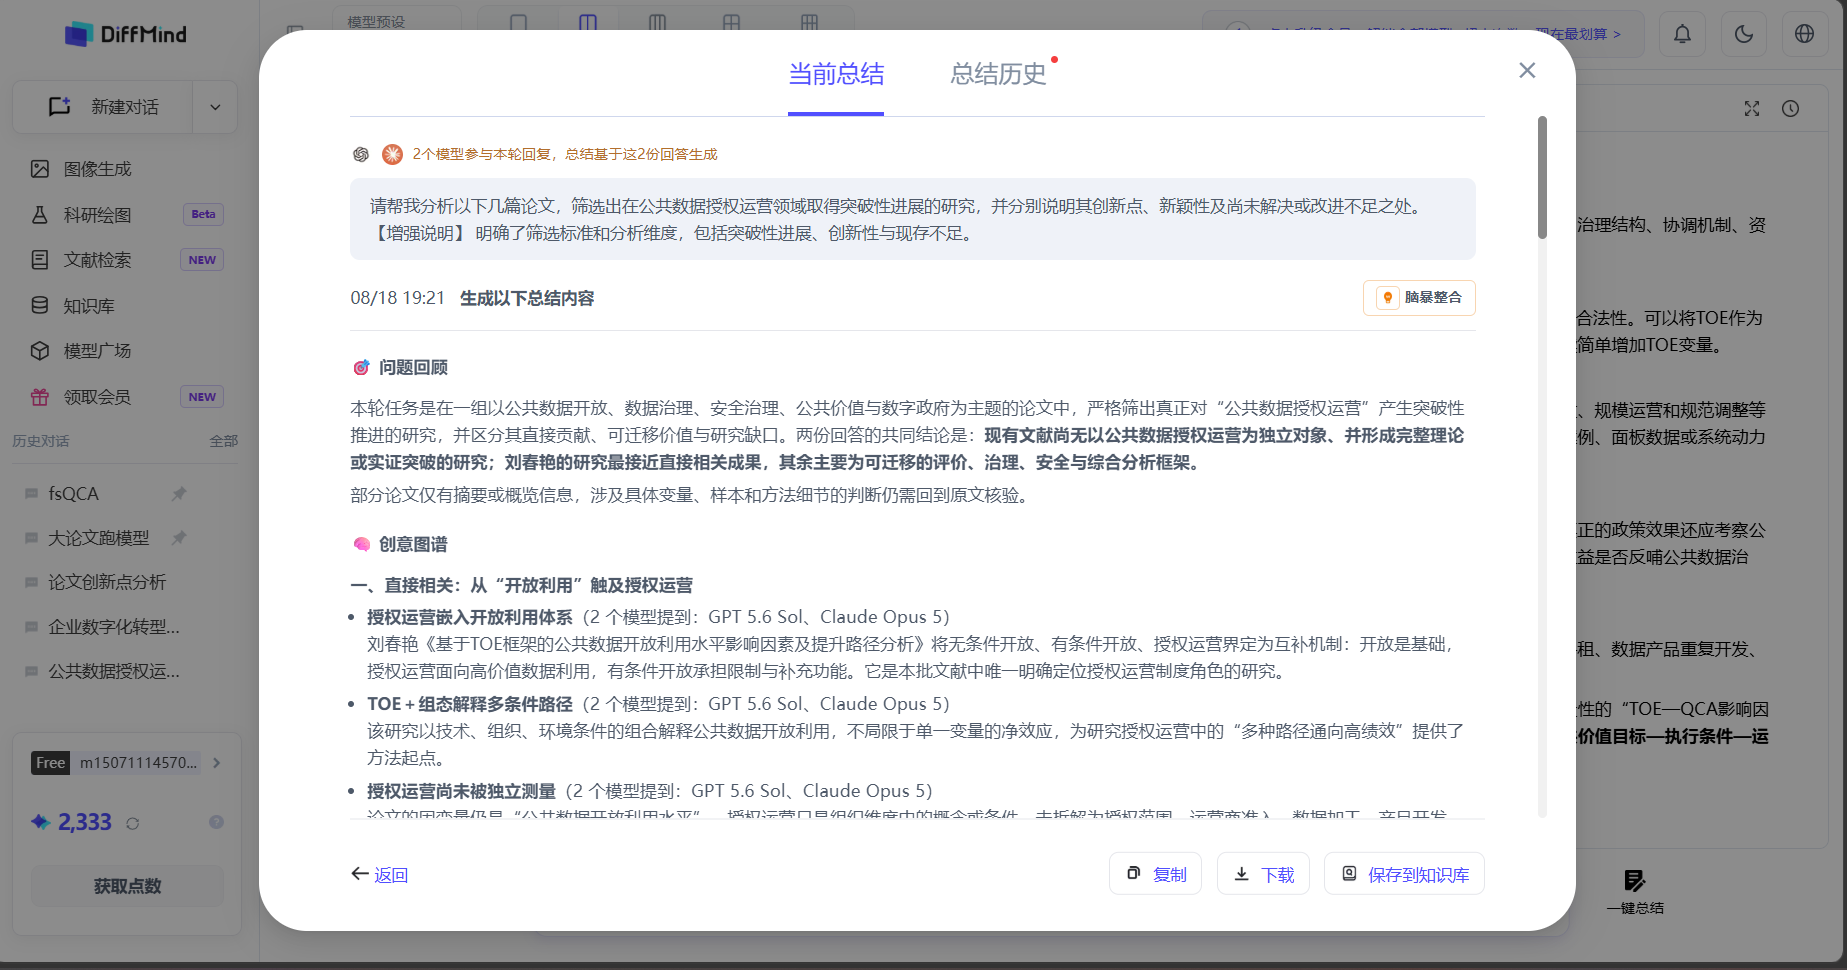
Organize replies with One-Click Summary
After models finish the round, open One-Click Summary. The page shows how many models will be included and the current question, then offers four modes:
Mode
Best for
Consensus
Merge several replies into one focused result.
Differences
See where models diverge on emphasis, conclusions, or advice.
Brainstorm
Regroup directions from several models into a fuller idea set.
Risks
Collect risks, gaps, and omissions mentioned across replies.
The result stays in the current chat. Summary history lets you reopen an earlier summary without running the same step again.
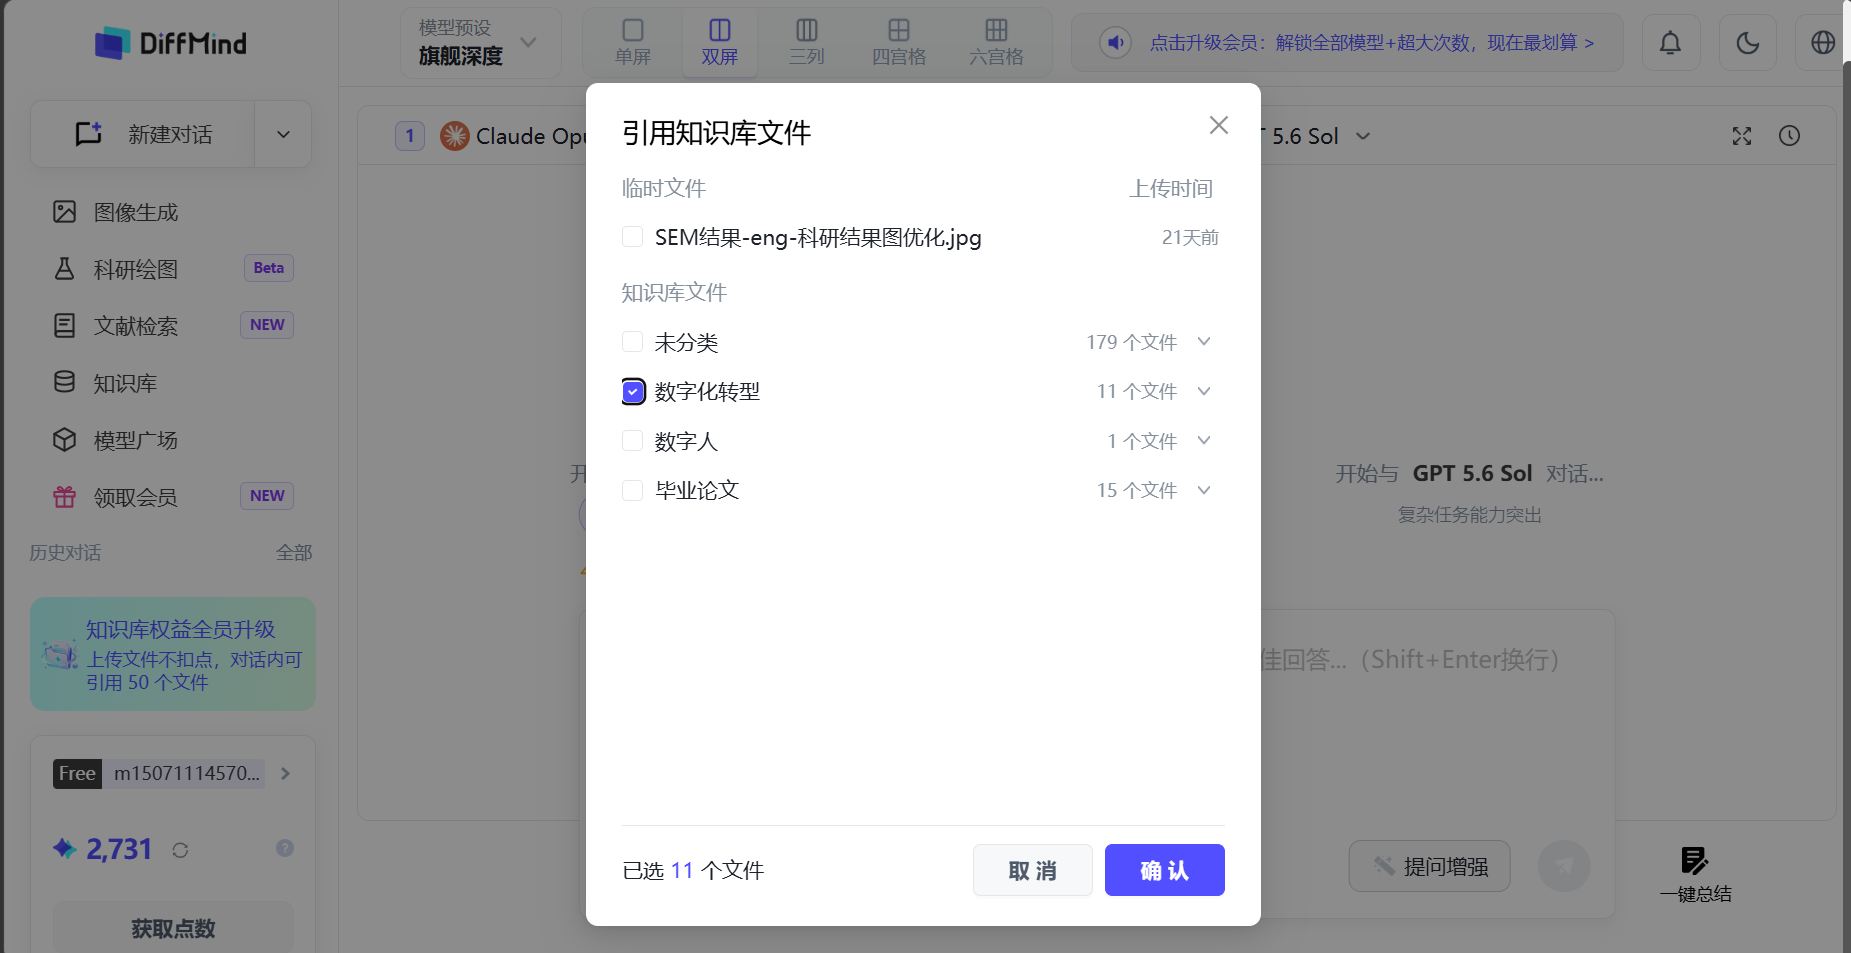
DiffMind has two ways to use materials. Files for this task only can be attached in chat and enter temporary storage (kept 7 days by default). Materials you will reuse can be uploaded to the knowledge base first. Both can go to one or many models—the difference is whether you need long-term management.
Attach now or store in the knowledge base
Situation
Suggested path
Use once in this chat
Upload files or images directly.
Reuse in later chats
Upload to the knowledge base first.
Many papers, reports, or docs in one project
Create a category, then manage them together.
Already in the knowledge base
Select from there—do not re-upload.
For a one-off report, attach the file in chat. For a set of papers you will reread, create a topic category first and only cite what this round needs.
Add files or images in the current chat
Use Upload files or images in the bottom composer and pick what this round needs. Check names and count before sending. Broadcast when every model should see the same material; use a window’s own composer when only one model should.
If a file does not attach, read the on-page reason: unsupported format, file too large, or count limit.
Create knowledge-base categories
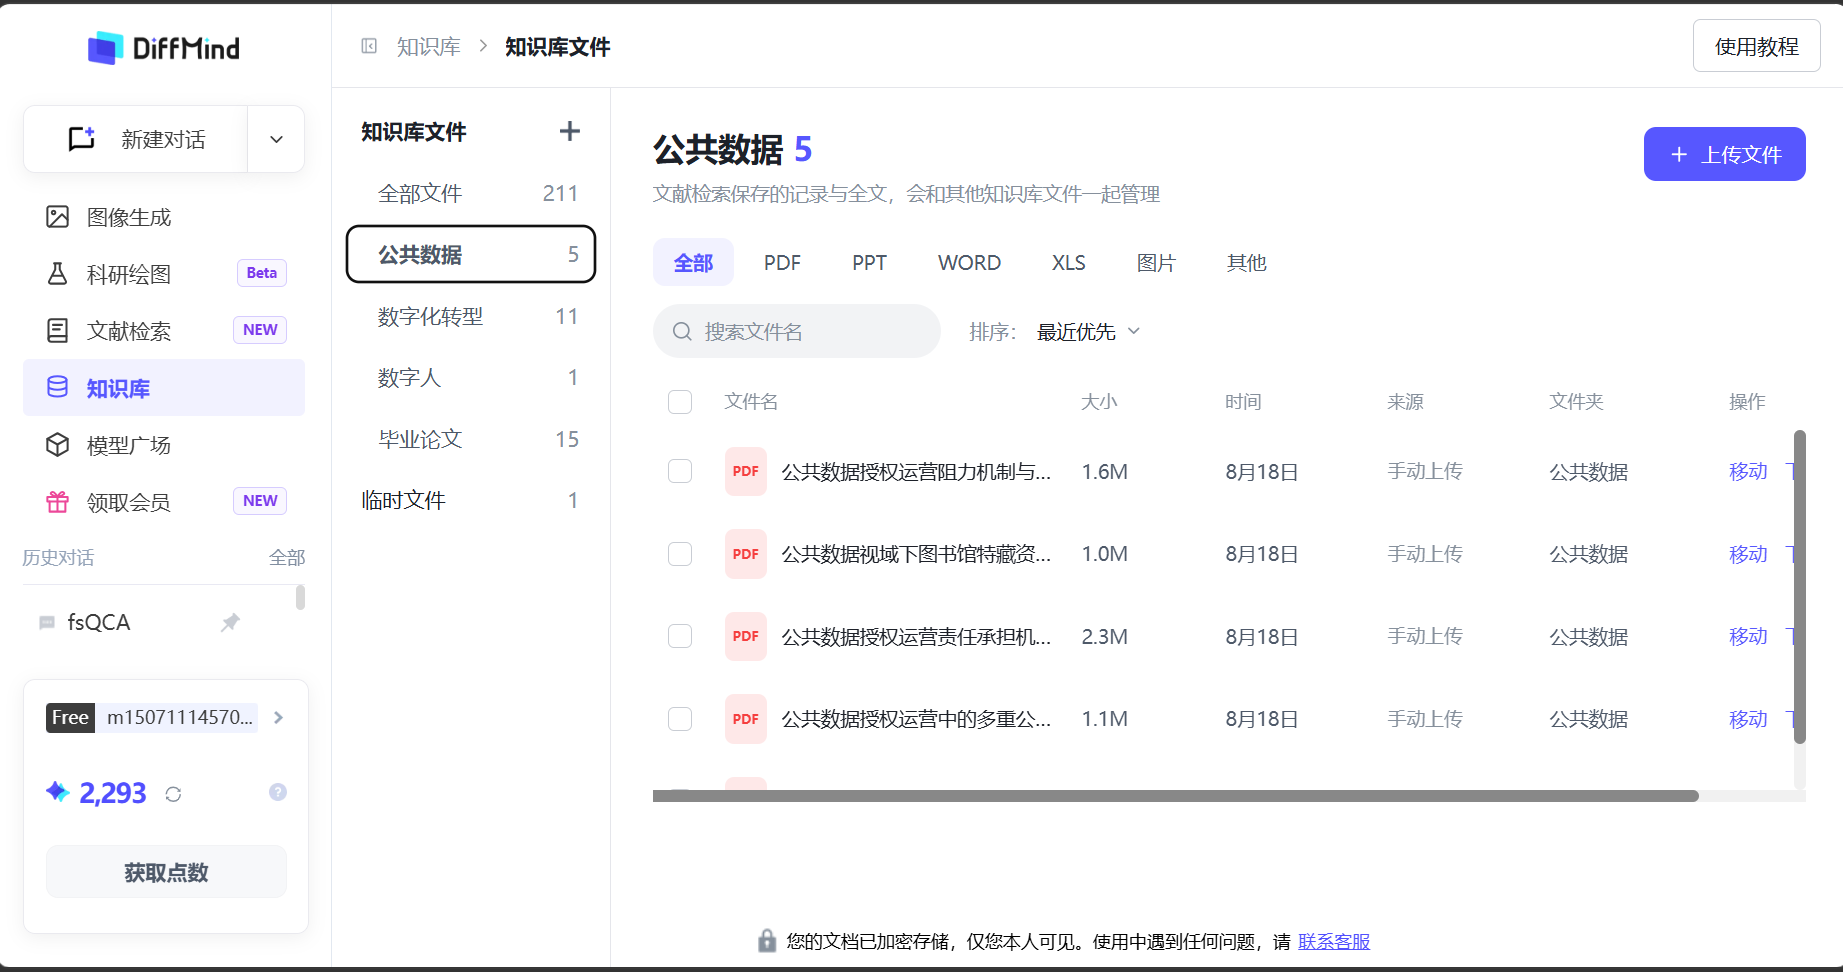
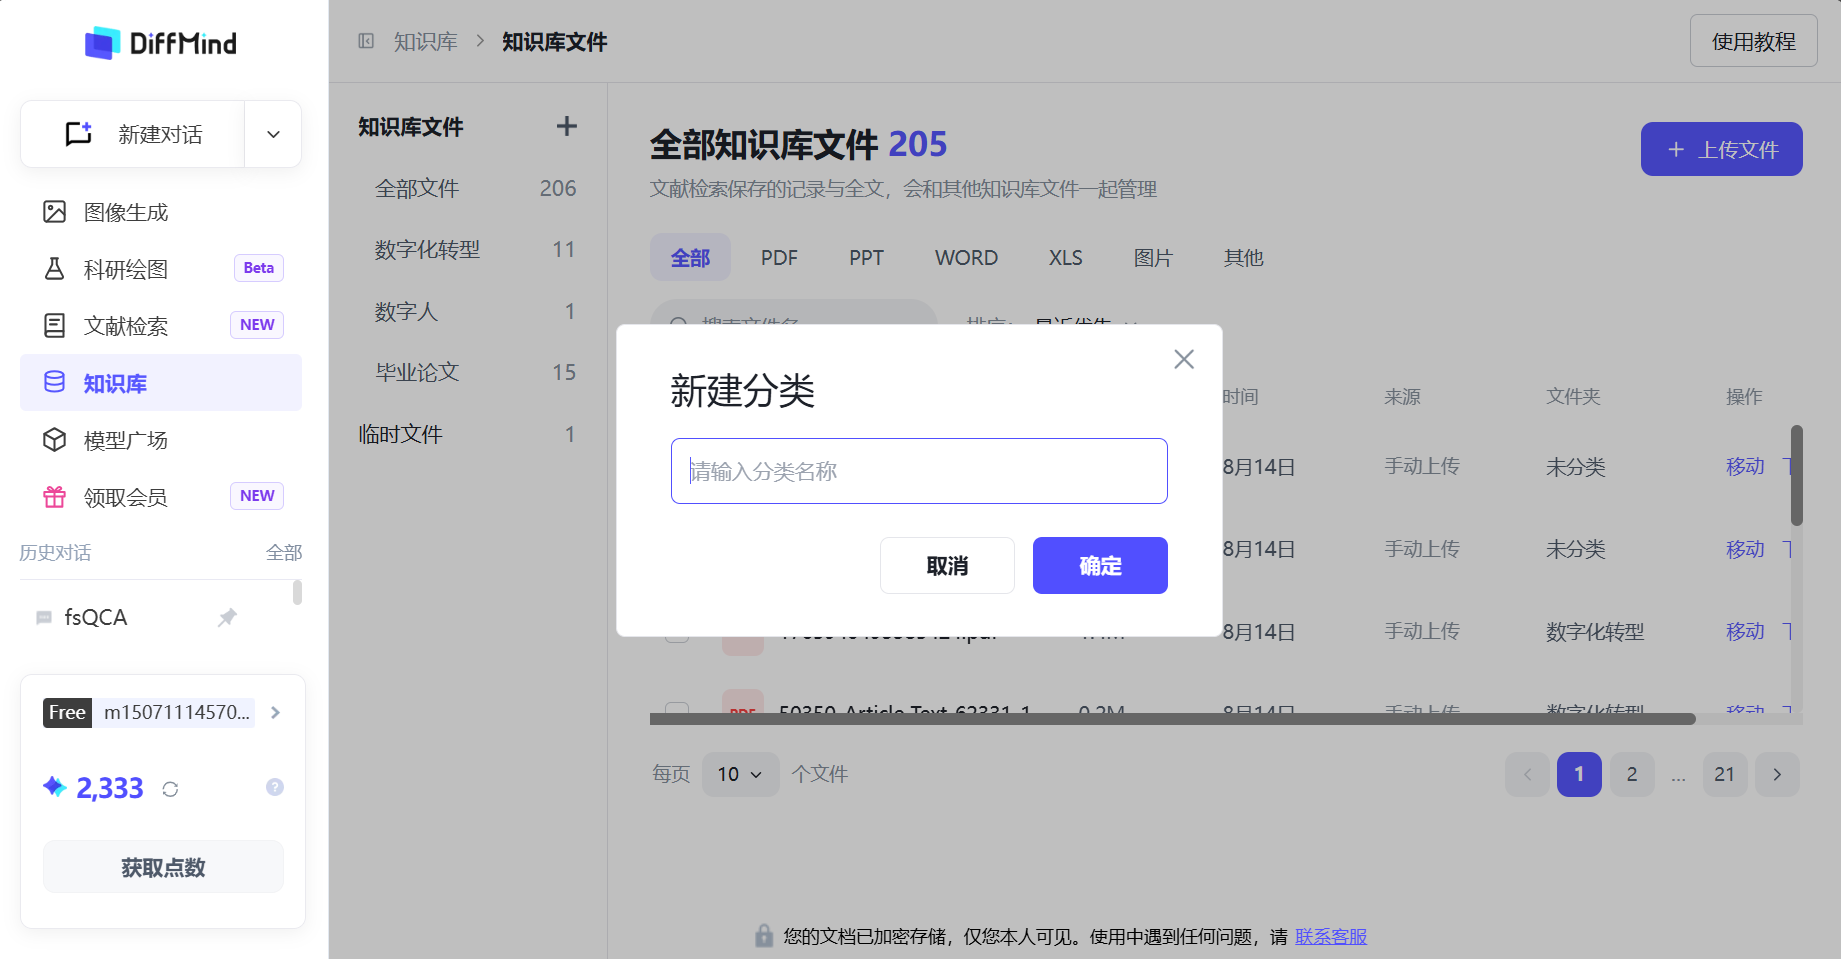
Open Knowledge base on the left to see all files, custom categories, and temporary files. For a lasting set of materials, create categories by topic, course, project, or workflow, then place files there. Categories do not change file content—they make later reuse faster.
A knowledge-base upload currently supports up to 100 items. Formats, per-file size, and total capacity follow the in-product notes.
Filter, batch-manage, and cite in chat
When you have many files, filter by types such as PDF, PPT, or Word. After selecting files, you can move, download, or delete them. Double-check before deleting anything still in use.
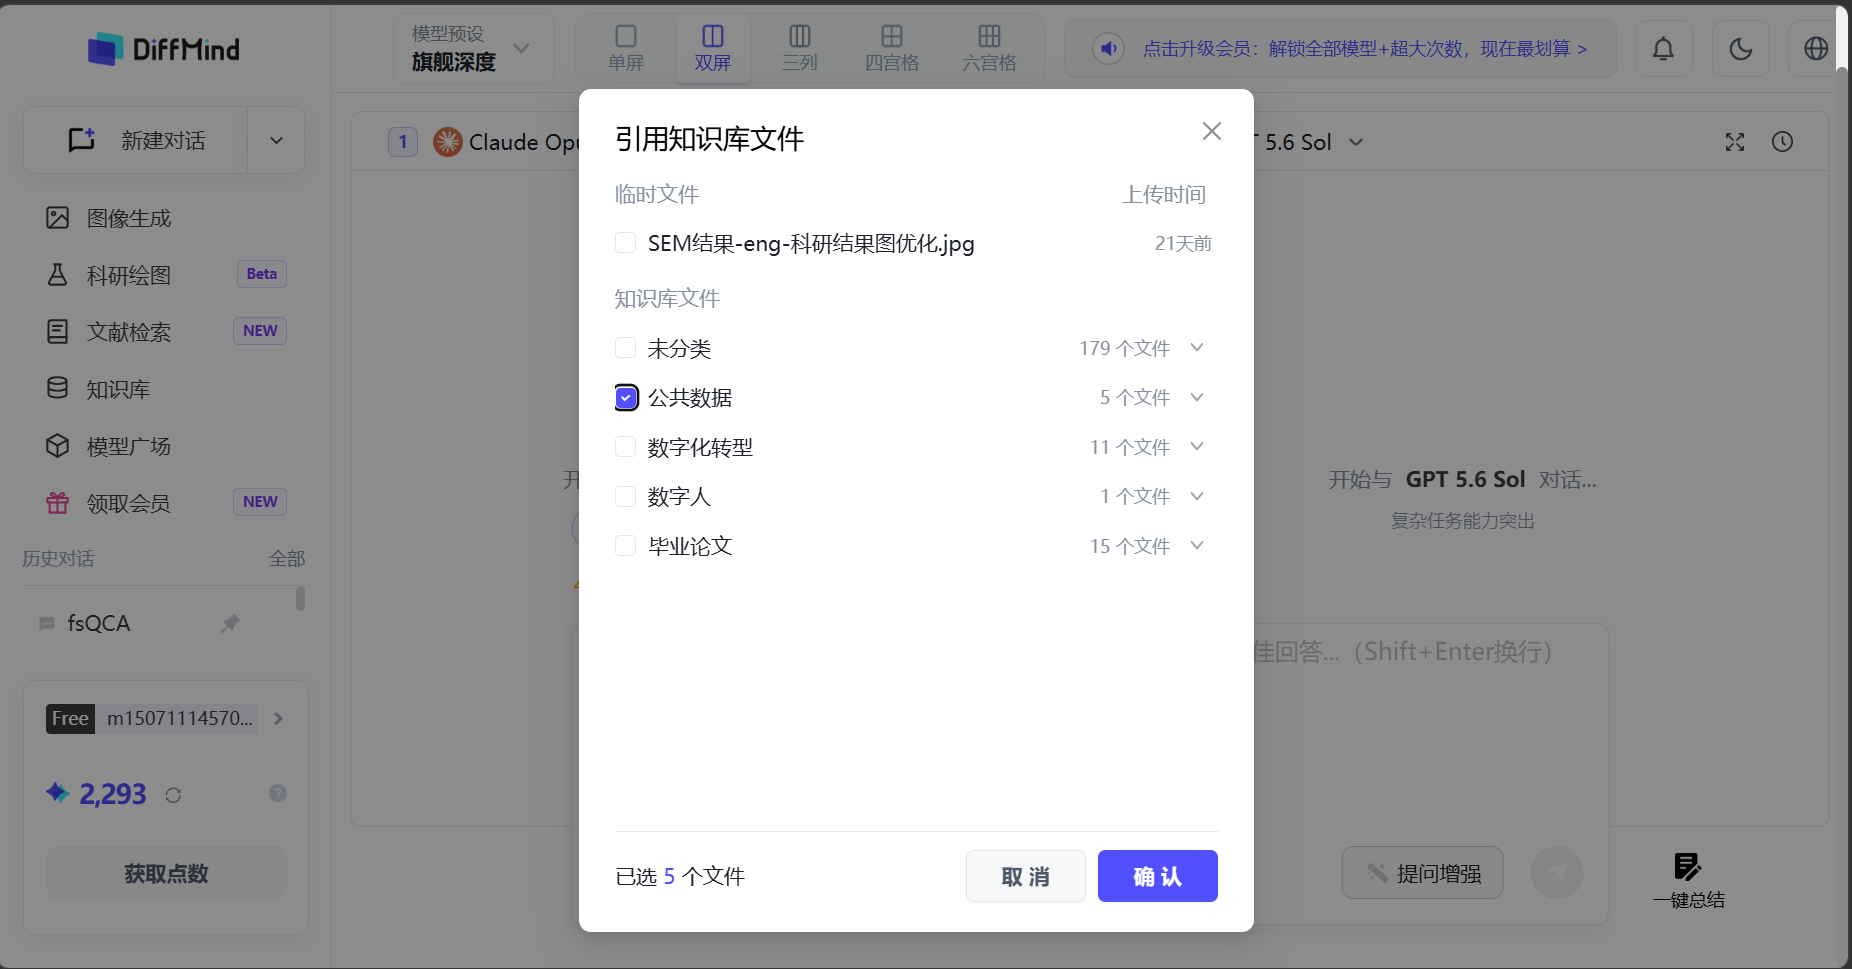
Saved files do not need another local upload. Open the knowledge-base picker in the composer, browse categories, and select what this round needs. A chat can currently cite up to 50 knowledge-base files—pick what is actually relevant.
After materials enter the model windows, later messages can stay on the same set—you do not need to attach them again every turn. You can also split follow-up work across windows.
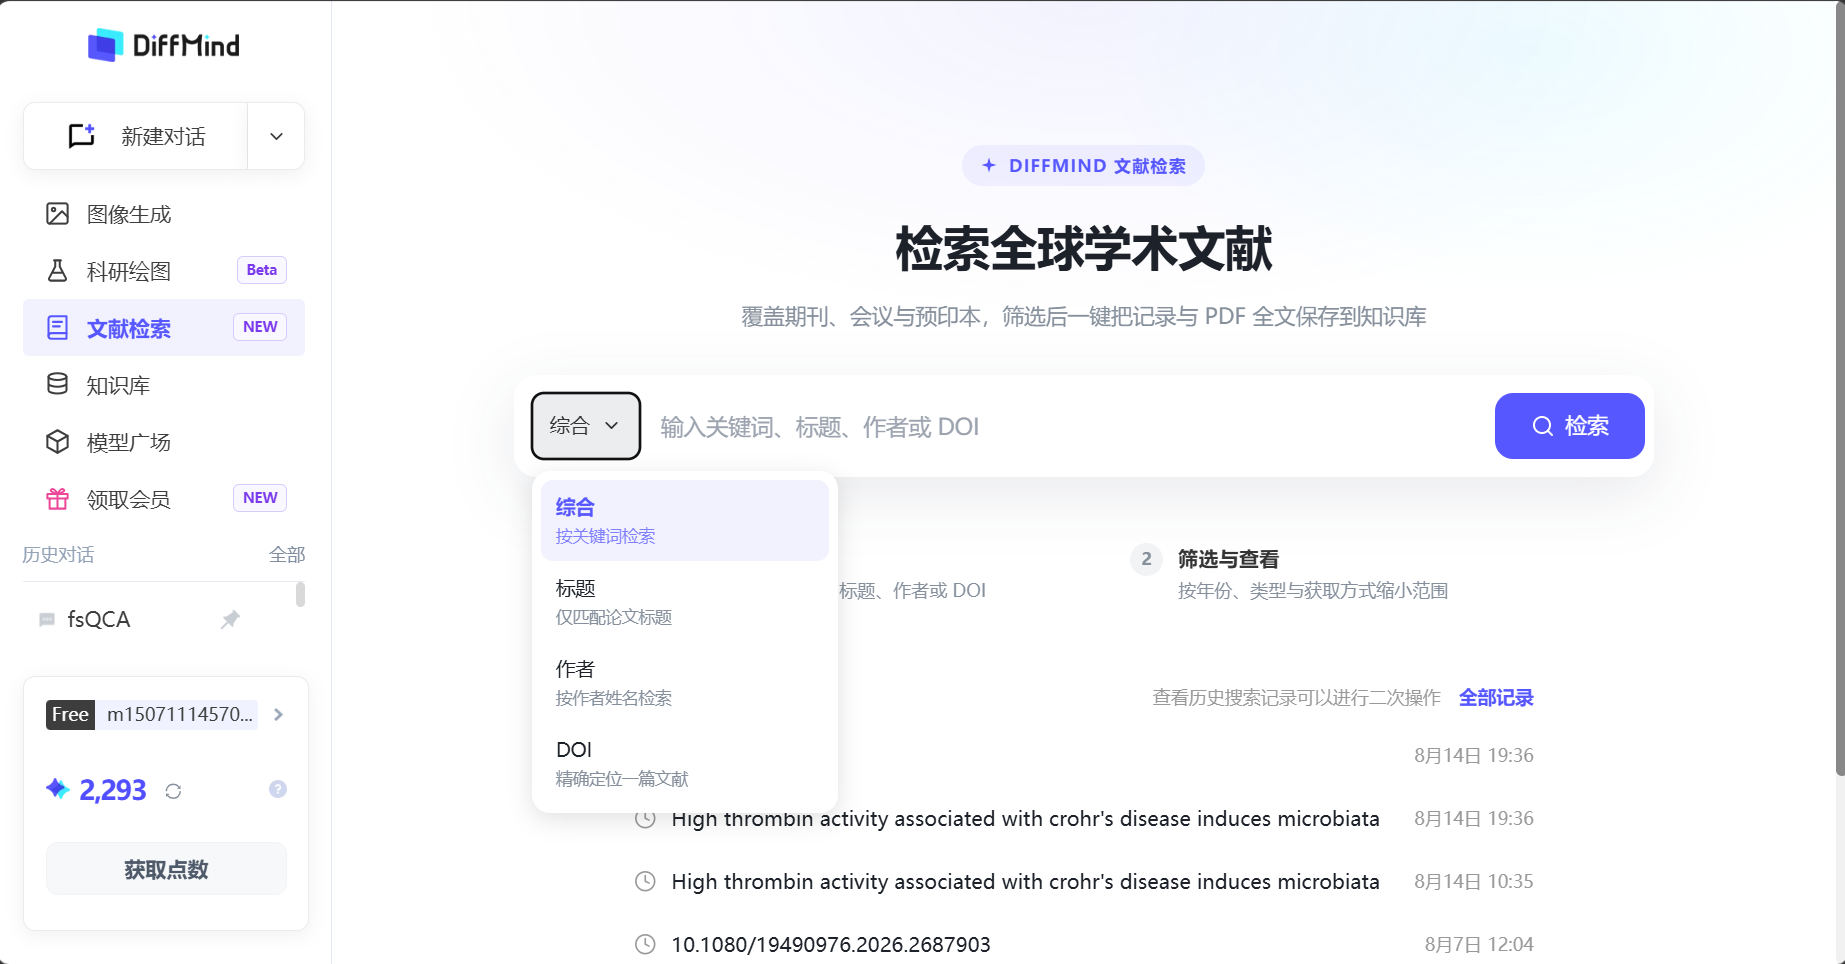
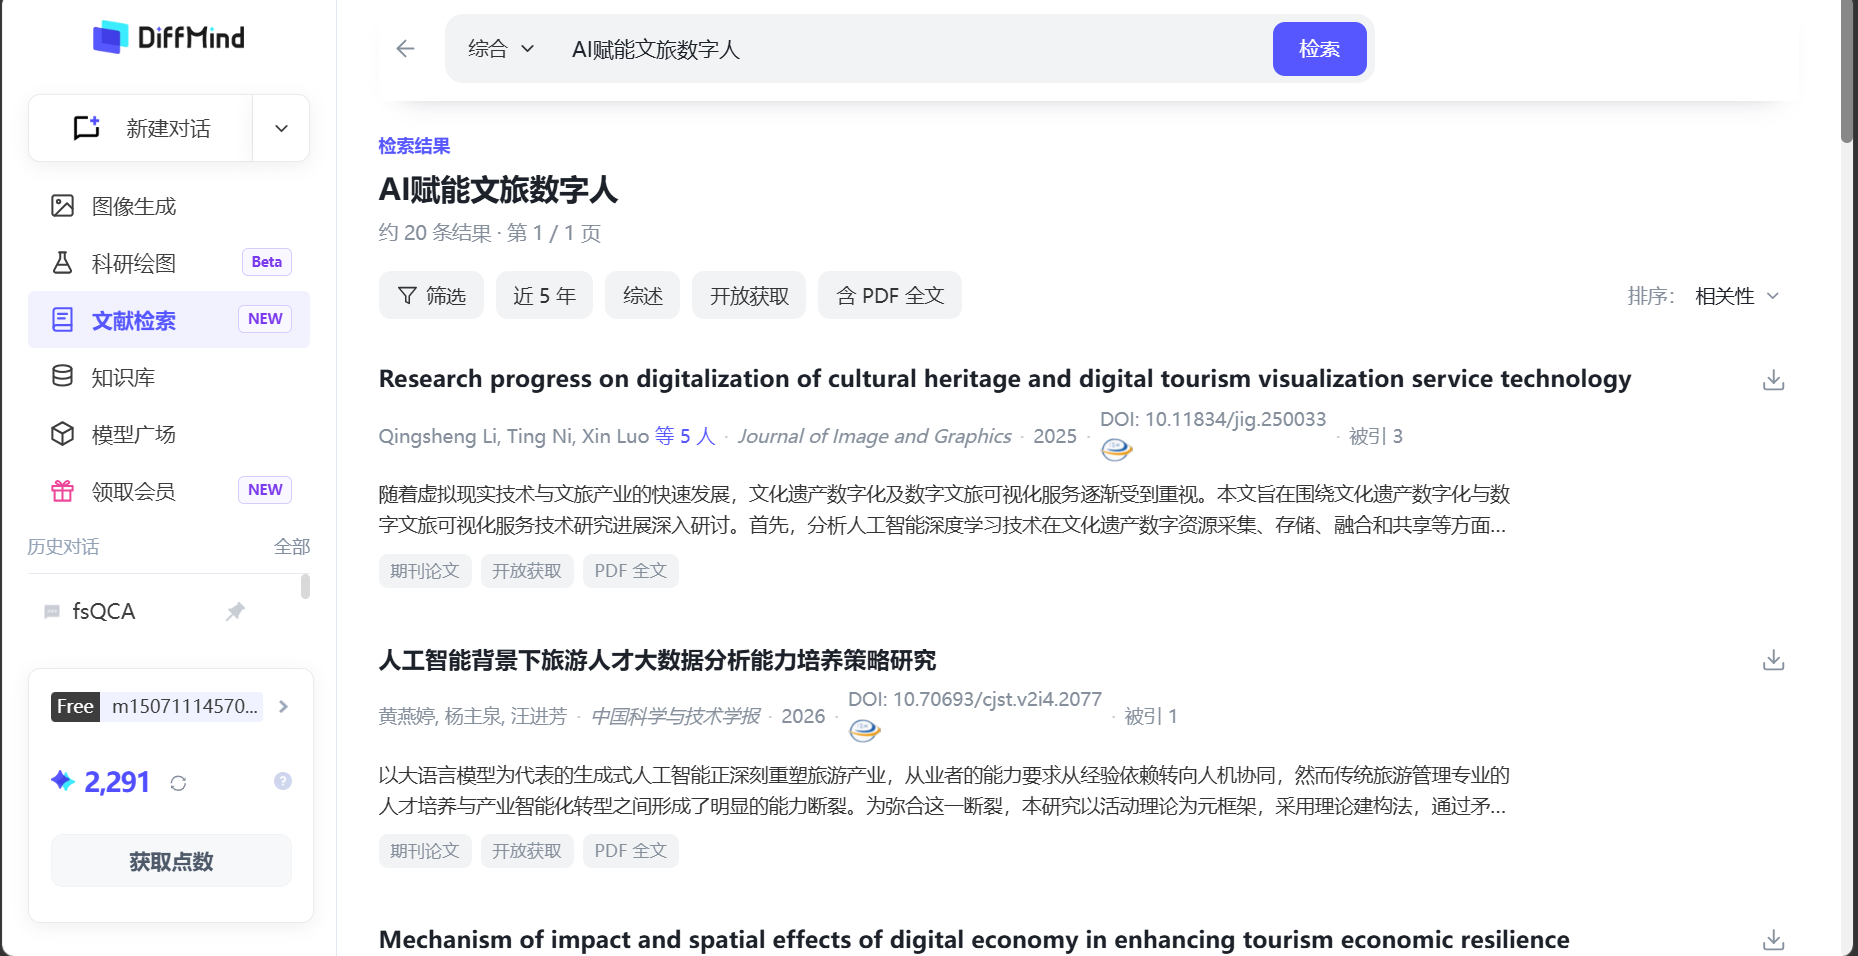
Literature search sits in the left navigation. Before you search, decide whether you are discovering papers by topic or locating literature you already know something about. That choice picks general, title, author, or DOI search.
Pick a search mode from what you know
What you already have
Mode
What to enter
A topic or keywords
General
Topic terms, keywords, or related concepts
A paper title
Title
The full title, or enough of it to identify the paper
An author’s papers
Author
The author’s name
A DOI
DOI
The full DOI, or a form the page can recognize
General search is for discovery. The other three modes are for locating a known paper or author. Confirm the query matches the selected mode before you search.
Discover papers or locate known ones
If you do not have a specific paper yet, use general search and enter the research topic as a set of core concepts—not a long prompt. If results are too few, drop overly strict words. If they are too many, add a more specific concept, or filter by year and literature type.
Use title search when you know the title, author search to browse one researcher, and DOI search when you already have a DOI. Author search may return people with the same name—narrow by topic, year, and source.
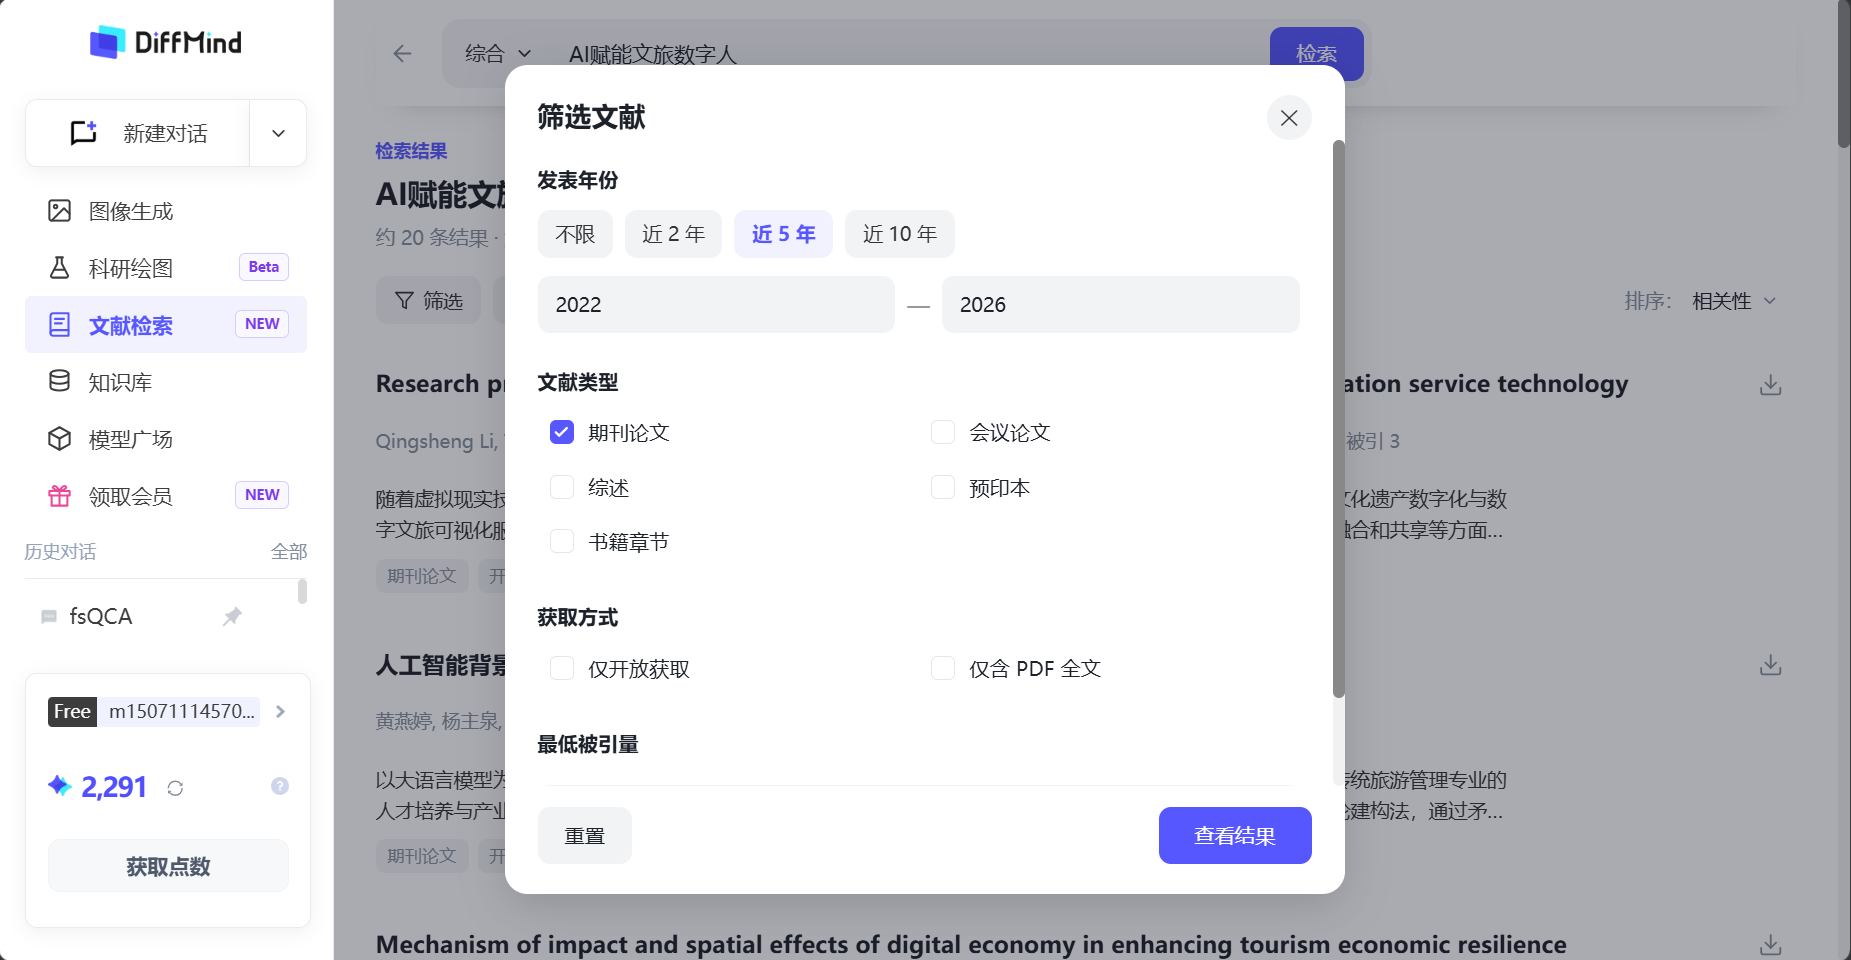
Narrow results with filters
Year: Limit publication time.
Literature type: Journal articles, conference papers, reviews, preprints, book chapters, and other current options.
Open access: Keep results marked as open access.
PDF full text: Keep results currently marked as having PDF information.
A PDF or open-access badge does not mean every external full text is reachable—follow the result page. Pagination keeps your query and filters.
Read the result list
Each row shows title, authors, year, source, and any available access marks. Scan the title first, then authors, year, and source. Open details or the source when you need more.
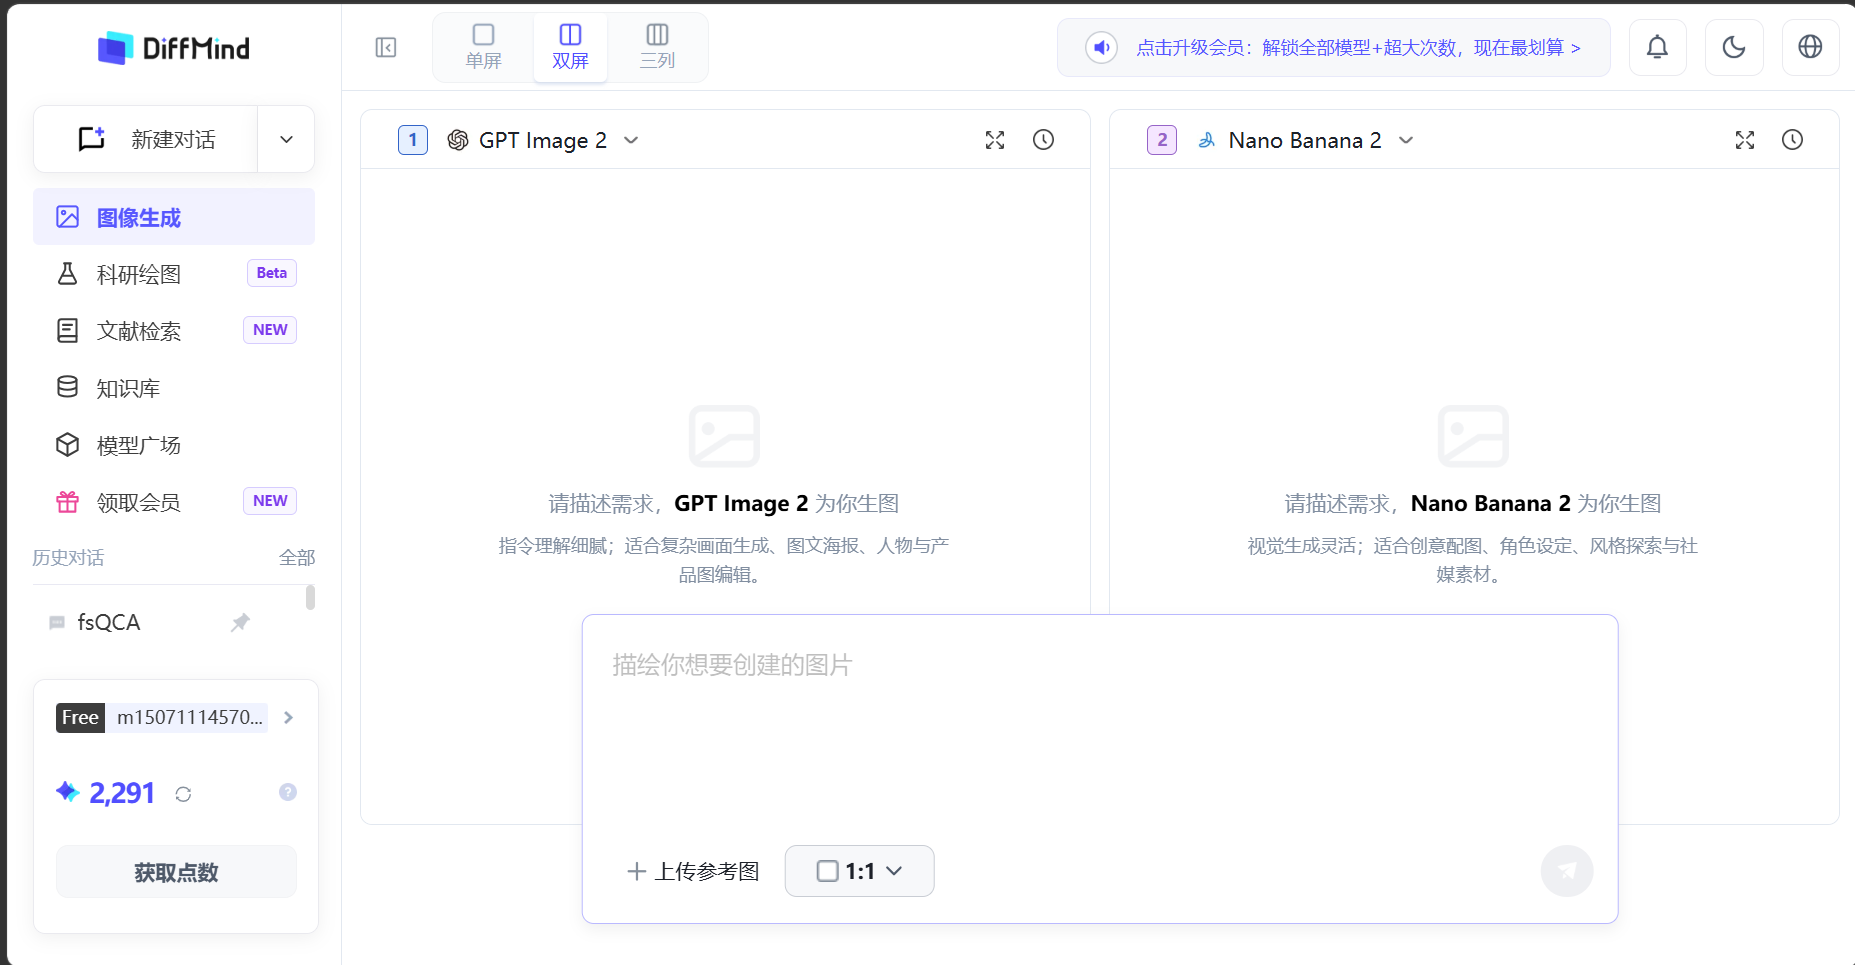
Image generation follows the same pattern as multi-model chat. Configure several image models, send one description, and compare results side by side.
Set up the image workbench
After you enter image generation, pick a 1-, 2-, or 3-pane layout, then assign an image model to each window. Focus on each model’s generation style and the kinds of scenes it handles well.
Broadcast, compare, and refine one result
Write the scene in the bottom composer and confirm size, aspect ratio, or other current options. The same prompt goes to every image window. Finished panes can be reviewed before the others complete.
To refine one image, open that window’s own composer and send the change. Later generations stay in that pane; other models keep their original outputs. Image history lets you return to earlier runs.
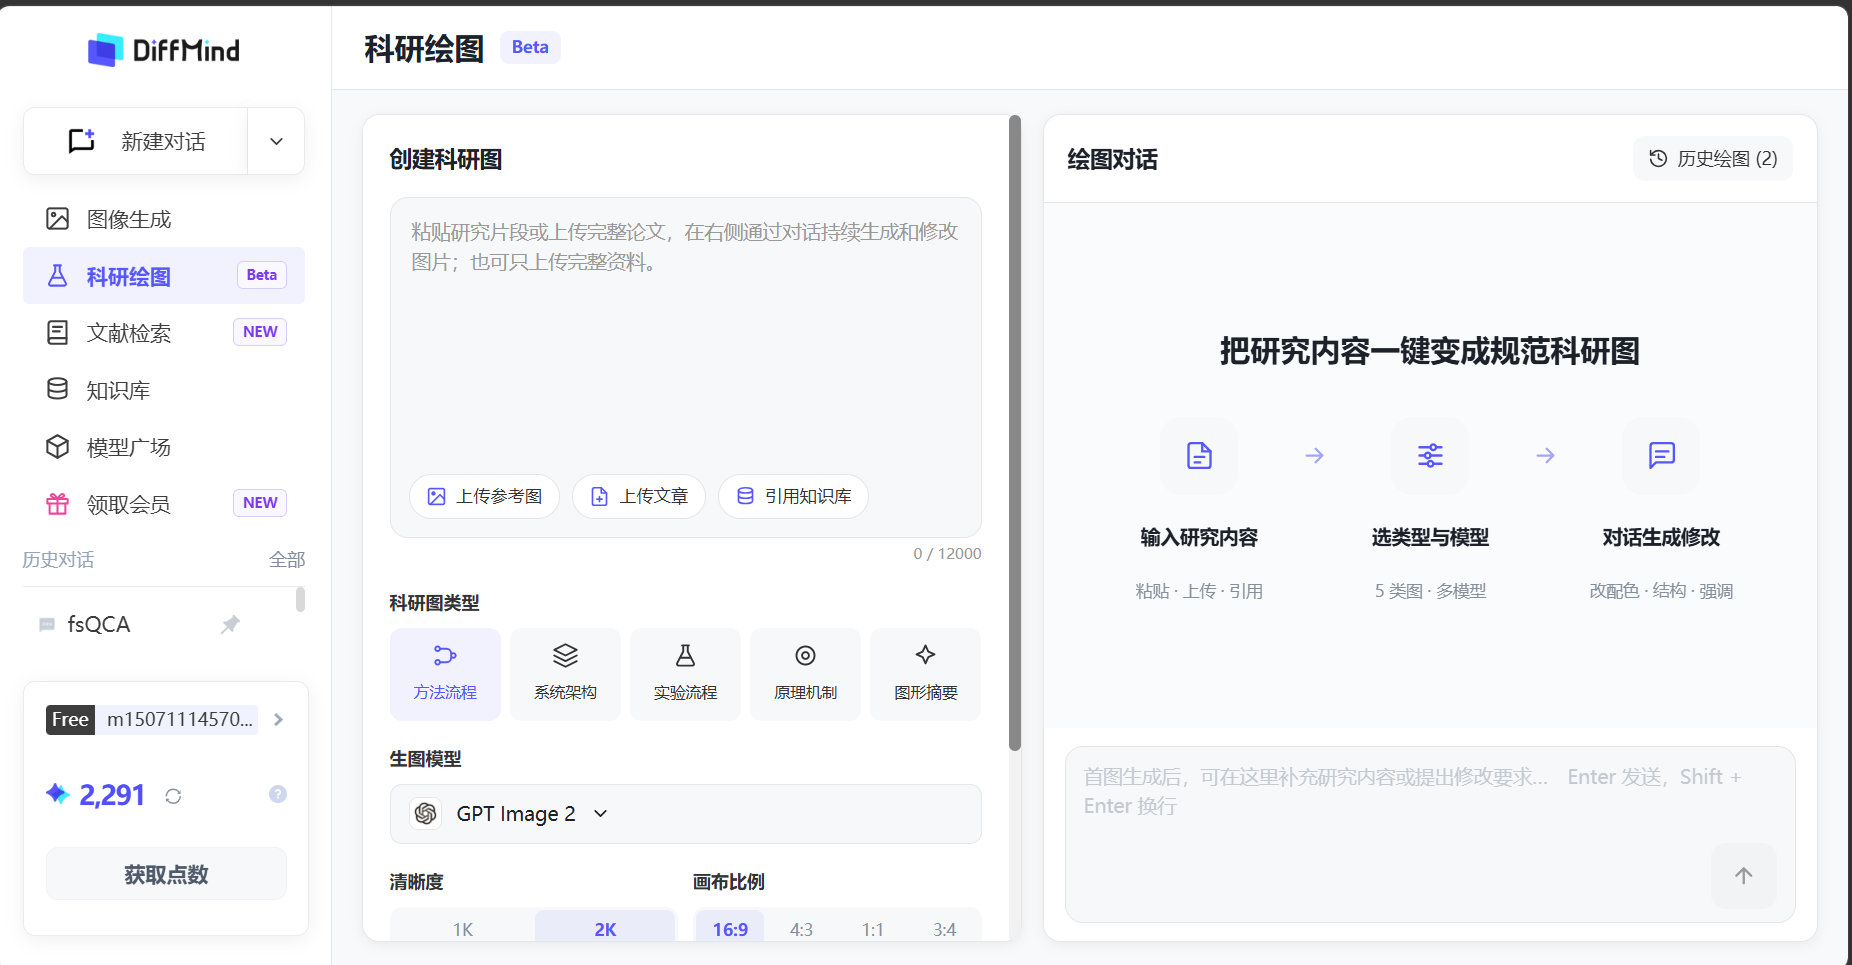
Scientific figures sits in the left navigation and is currently marked Beta. It gathers research inputs, figure types, color settings, and generation options on one page for methods flows, system diagrams, experiment processes, mechanisms, graphical abstracts, and other types available in product.
Add materials, choose a type, and generate
Before generating, you can upload a paper, add reference images, cite knowledge-base files, or describe what should appear. Papers and knowledge-base files supply the research content; reference images supply visual cues; text fills in steps, modules, relations, and labels.
Figure type sets the main visual form. After materials, type, and colors are set, choose a drawing model, clarity, and aspect ratio such as 16:9, 4:3, 1:1, or 3:4, then generate.
Finished figures appear in the result area or figure history. From there you can edit, regenerate, copy, or download, depending on current product capabilities.
The model gallery, membership page, and points history explain which models and features your account can use. Switching models and presets is covered in Chapter 2—this chapter only covers model information and account entitlements.
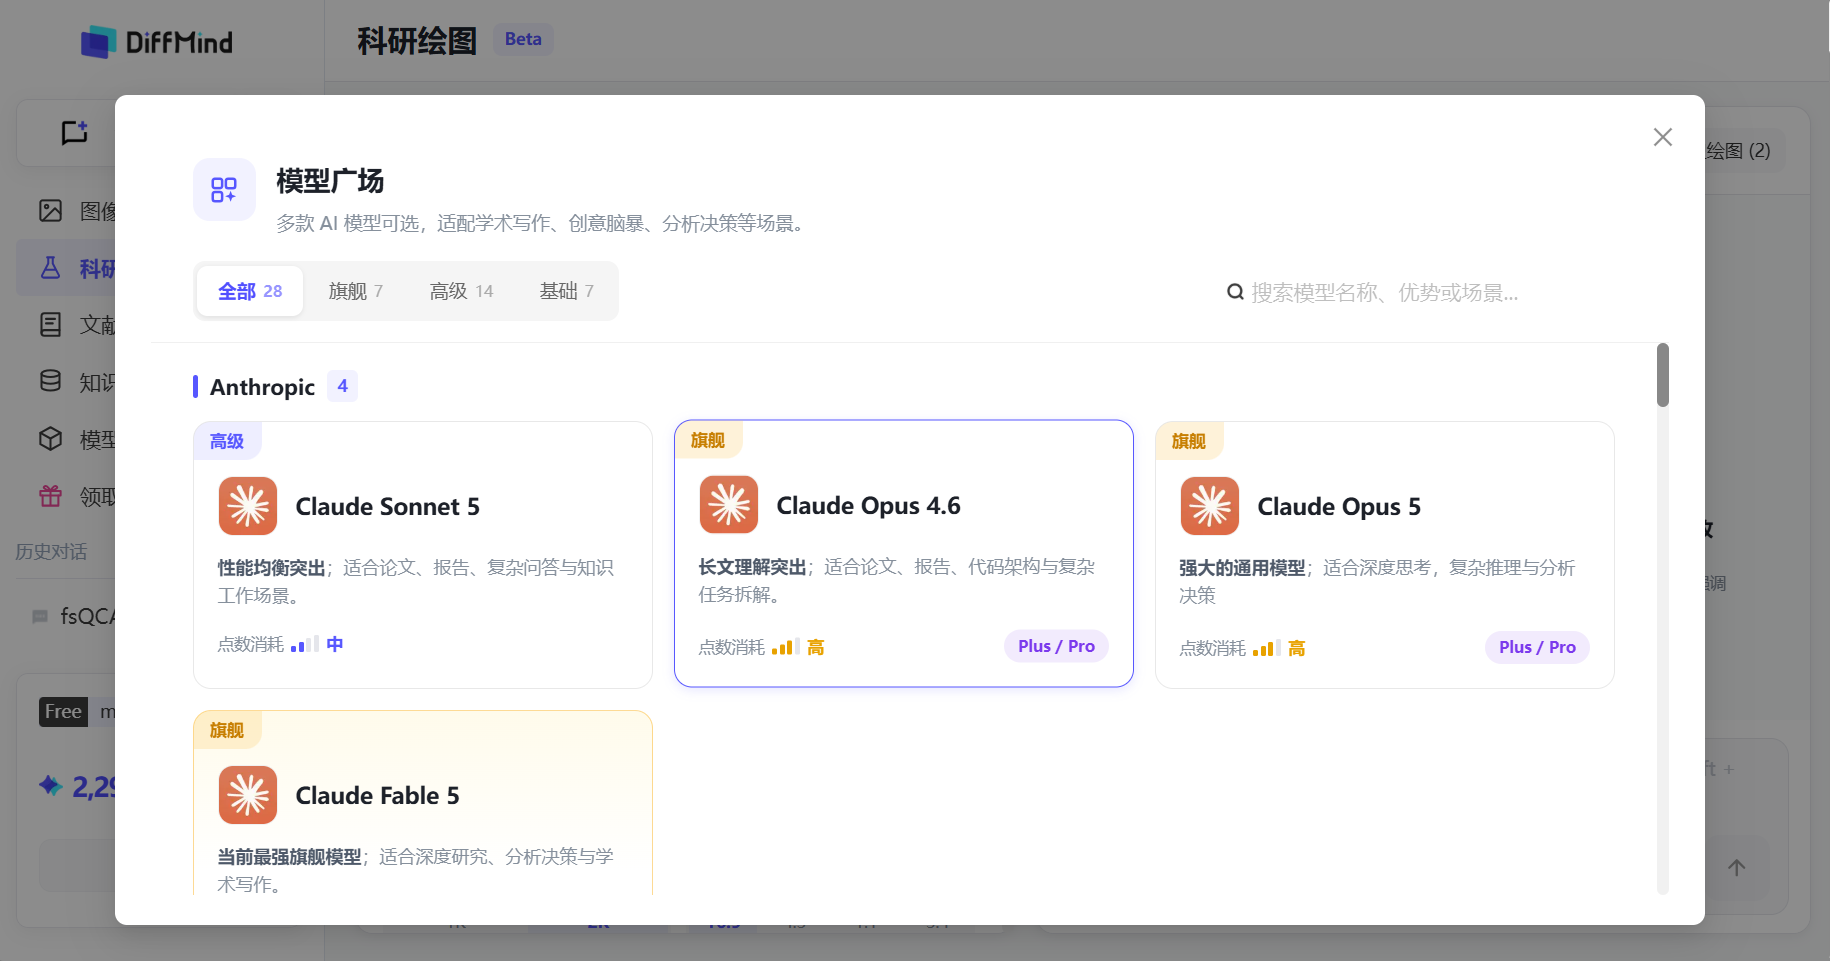
Browse the model gallery
The gallery lists official models currently connected to DiffMind. Browse by all, flagship, advanced, or basic tiers, and check name, strengths, tasks, point cost, and membership requirements. Model lists keep evolving, so this page does not freeze a count or full roster. Treat the in-product gallery as source of truth.
Review membership plans
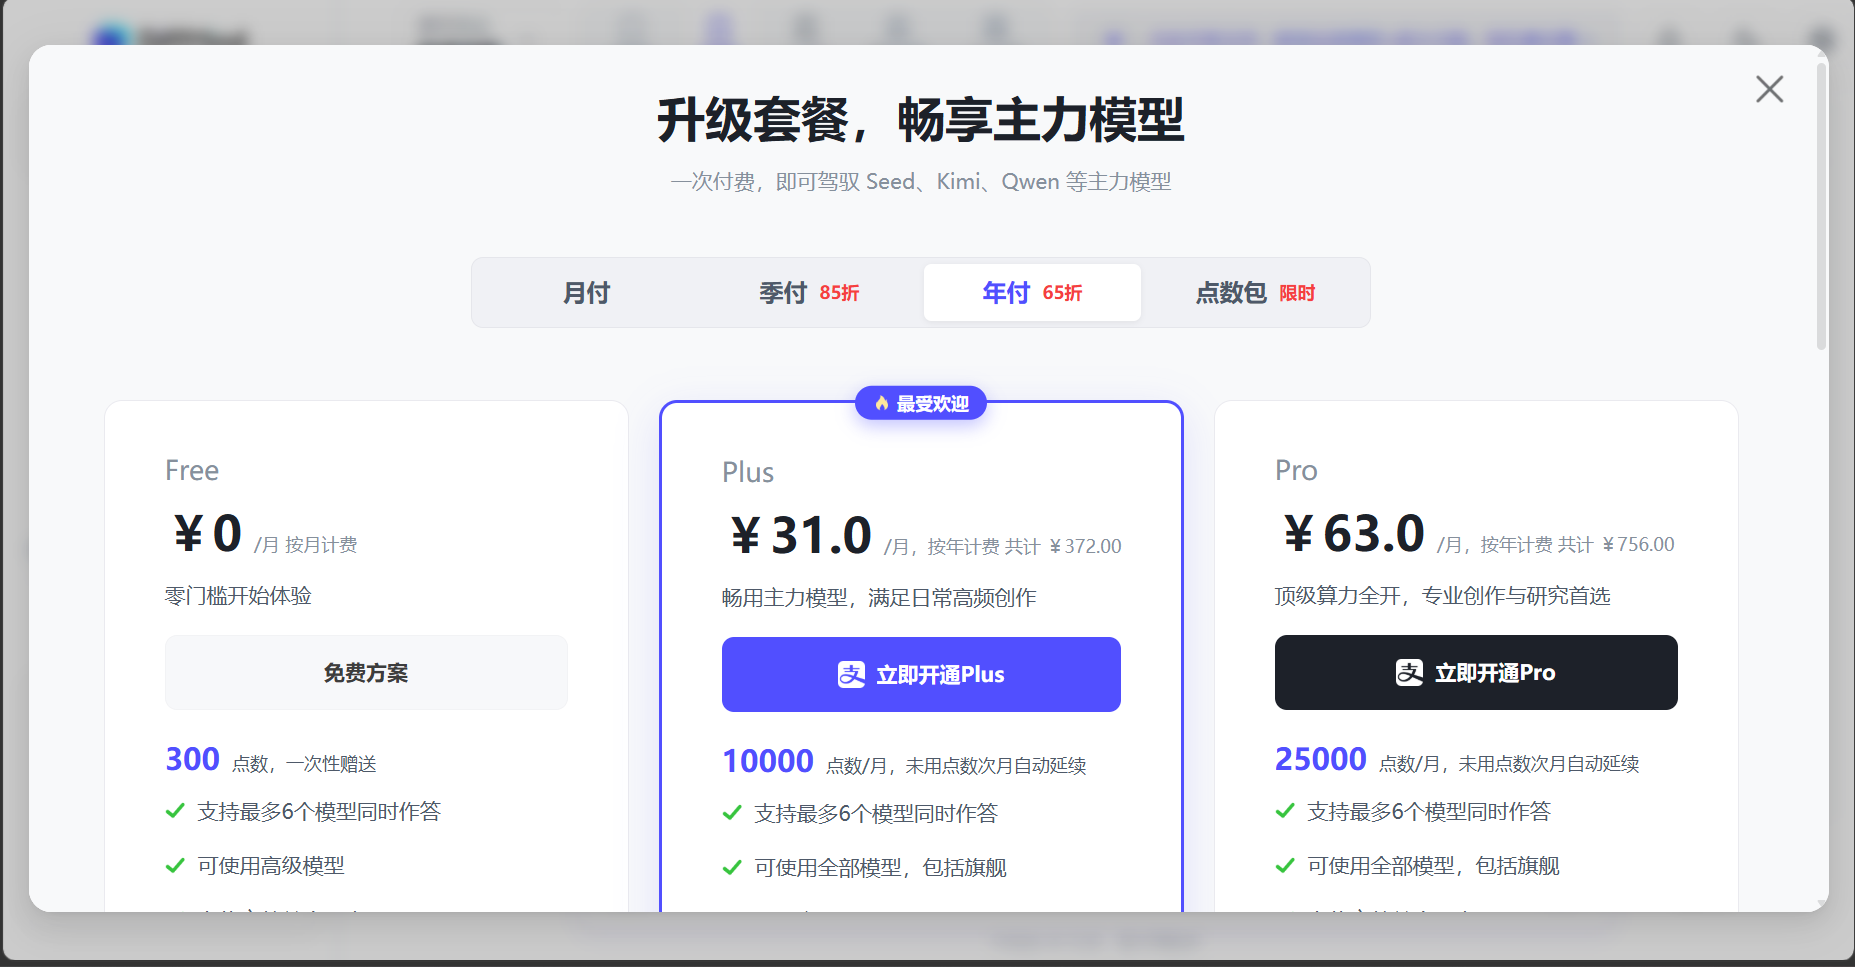
Open Claim membership on the left, or go through your profile, to compare current Free, Plus, and Pro benefits. Purchase pages have the full plan details.
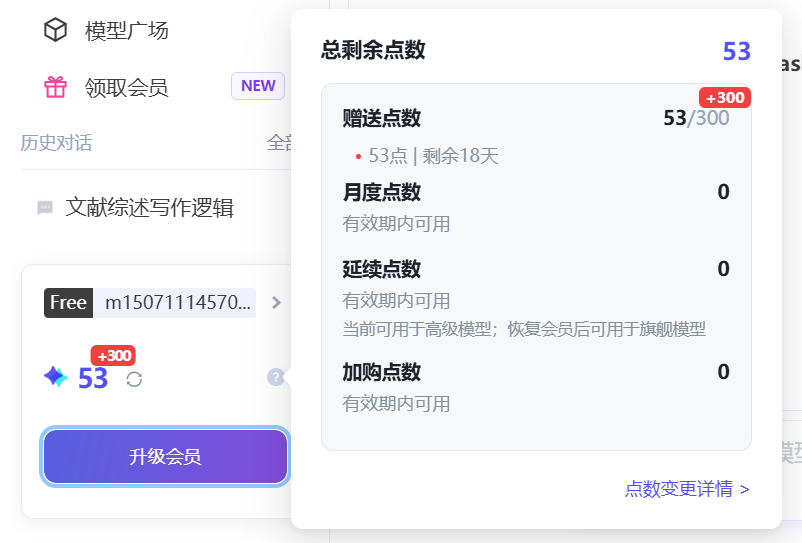
Some models, summaries, searches, and generation actions use points. The account area shows your balance and ways to earn or buy more. History lists grants, purchases, and usage. The cost of a given action is the number shown before you submit.
If a model or feature is outside your current plan, the page explains the action, the limit, and the next step. If you are out of points, follow the prompt to earn or buy more, or review membership.
This chapter only covers notes that do not belong in a feature chapter. It does not repeat multi-model chat, the knowledge base, literature search, or generation.
File and feature limits
Formats, file size, upload counts, and knowledge-base capacity depend on the feature and your account. When a prompt appears, first check whether it is about format, capacity, or count, then follow the next step on the page. Plans and points are covered in Chapter 7.
“Up to 100 items per knowledge-base upload” and “up to 50 citations per chat” are current product limits. If they change, this page will be updated.
Chats and file handling
Chat retention, file storage, deletion, and third-party model processing follow DiffMind’s privacy policy and product documentation.
Contact and feedback
For account, points, or product issues, use in-app support or feedback. For business or privacy questions, email info@diffmind.ai.